Tag: cycling

  • Race Across Québec

    Race Across Québec

    Le 300km de l’édition 2025 de la Race Across Québec était ma première expérience d’ultra-endurance. Une discipline qui gagne en popularité au Québec comme un peu partout ailleurs.

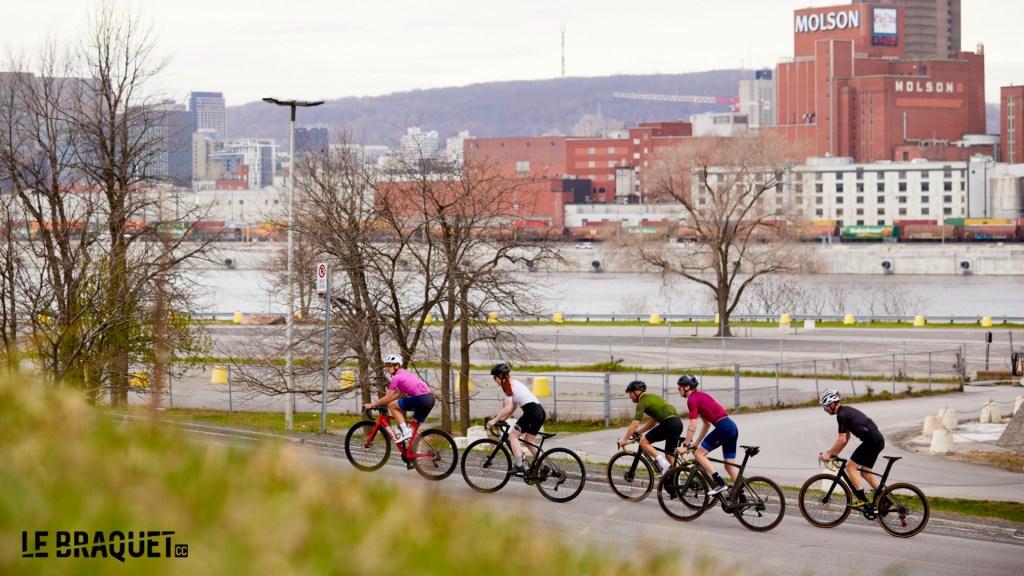
    Même avec plus de 30ans d’expérience de course de vélo, j’ai été surpris de découvrir une (nouvelle pour moi) communauté de cyclistes de tous horizons. Et il y a autant d’histoires, d’objectifs, de vélos qu’il y a de participants. Si la course de vélo (route, montagne, piste, cyclocross) tend à uniformiser le look , les vélos et l’équipement des participants, le cyclisme d’ultra-endurance fait bande à part.

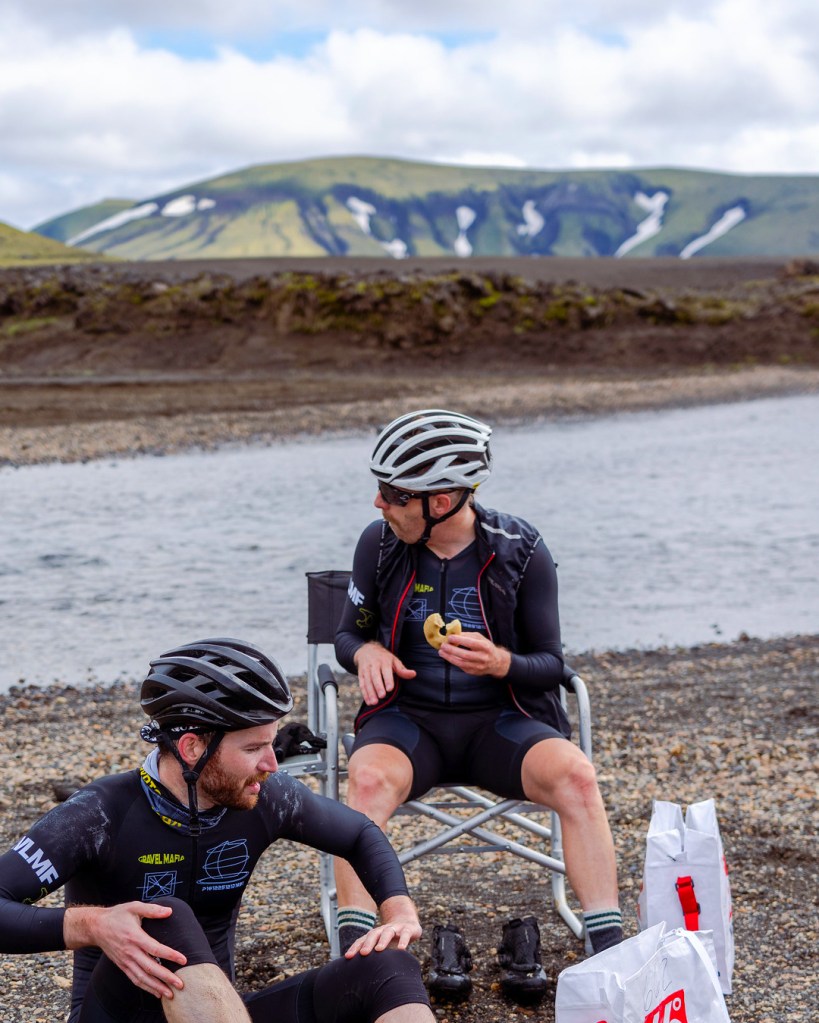
    C’est donc une communauté vibrante, amusante, pleine de couleurs, de sourires et de vie que j’ai découvert à mon arrivée au PAT à Terrebonne, quelques heures avant de planter ma tente.

    Avec un départ. à exactement 3:34:30 secondes du matin, pas le choix de dormir sur place. Heureusement, l’organisation propose un camping sur place.

    Avant le départ

    Comme c’était ma première course d’ultra-endurance, j’avais lu et relu et rerelu le guide du participant, les règlements et révisé ma liste de choses à apporter.

    En effet, il faut arriver prêt. Nourriture, eau, équipement de sécurité, outils, plan b, plan c, il faut un peu tout prévoir. Heureusement, c’est assez facile de trouver de l’information sur la préparation à ce genre d’évènement. Après avoir fait The Rift 2 fois, et le challenge Paris-Roubaix, j’avais une bonne idée de ce que je devais transporter avec moi.

    Ptite vidéo sur instagram à ce sujet

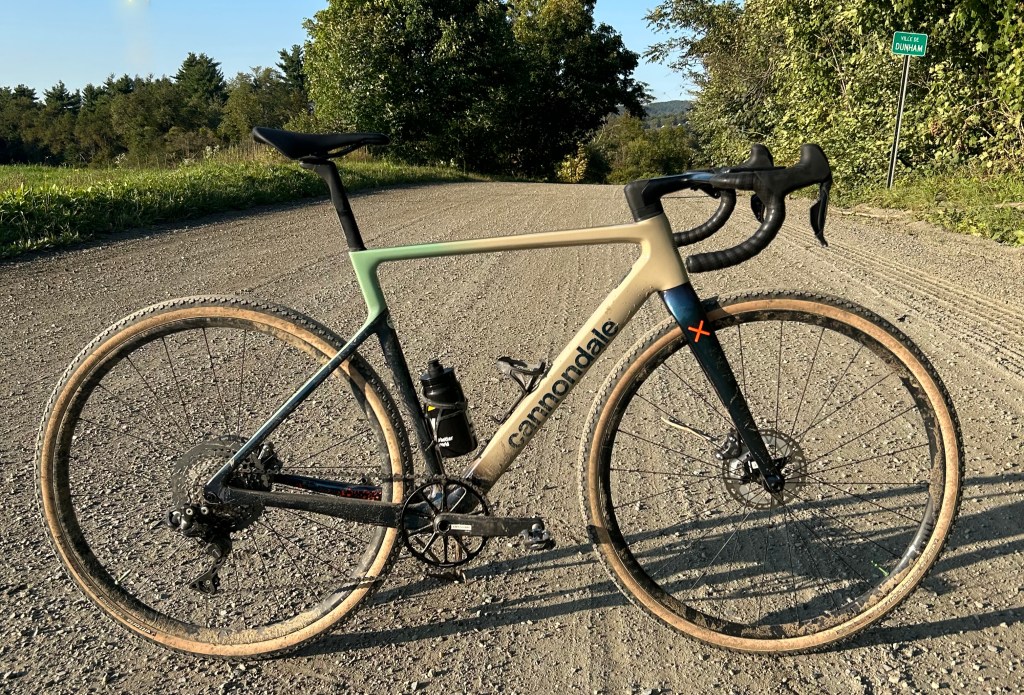
    Parlant de préparation, la nutrition et l’hydratation c’est important. Je m’étais préparé un collant avec tous mes arrêts que j’ai collé sur mon top tube. Comme je transportais mes électrolytes pour toute la distance, j’avais seulement besoin de m’arrêter pour de l’eau, parfois une petite boisson énergisante réconfortante et un ou deux ptits délices.

    Je parle de nutrition ici

    *à noter que la plupart des navigateurs permettent de traduire le site en français ou en anglais. C’est une cool fonction de l’internet moderne.

    C’est donc en pleine nuit, avec toute ma nourriture, mon eau, ma couverture de survie et pleins d’autres bébelles que j’ai commencé mon aventure de 325km. Oui oui, ils te font croire que c’est 300km, mais en réalité, c’est 325, ce qui mine de rien, t’ajoute une heure de vélo.

    Quel évènement

    L’équipe d’organisateurs de la race across Québec est incroyable. Comme participant, on est pris en charge par une équipe aimable, attentionnée, passionnée. Le sérieux de l’organisation, son dévouement et sa proximité avec les participants rendent l’expérience tellement agréable.

    Le simple fait qu’on nous fournisse un tracker GPS, et qu’on puisse suivre les participants pendant leur périple est un aspect vraiment cool de cet évènement.


    Non seulement l’organisation est World Class, mais les gens sont présents, terre à terre. Il y a une proximité qui te fait sentir bienvenue.

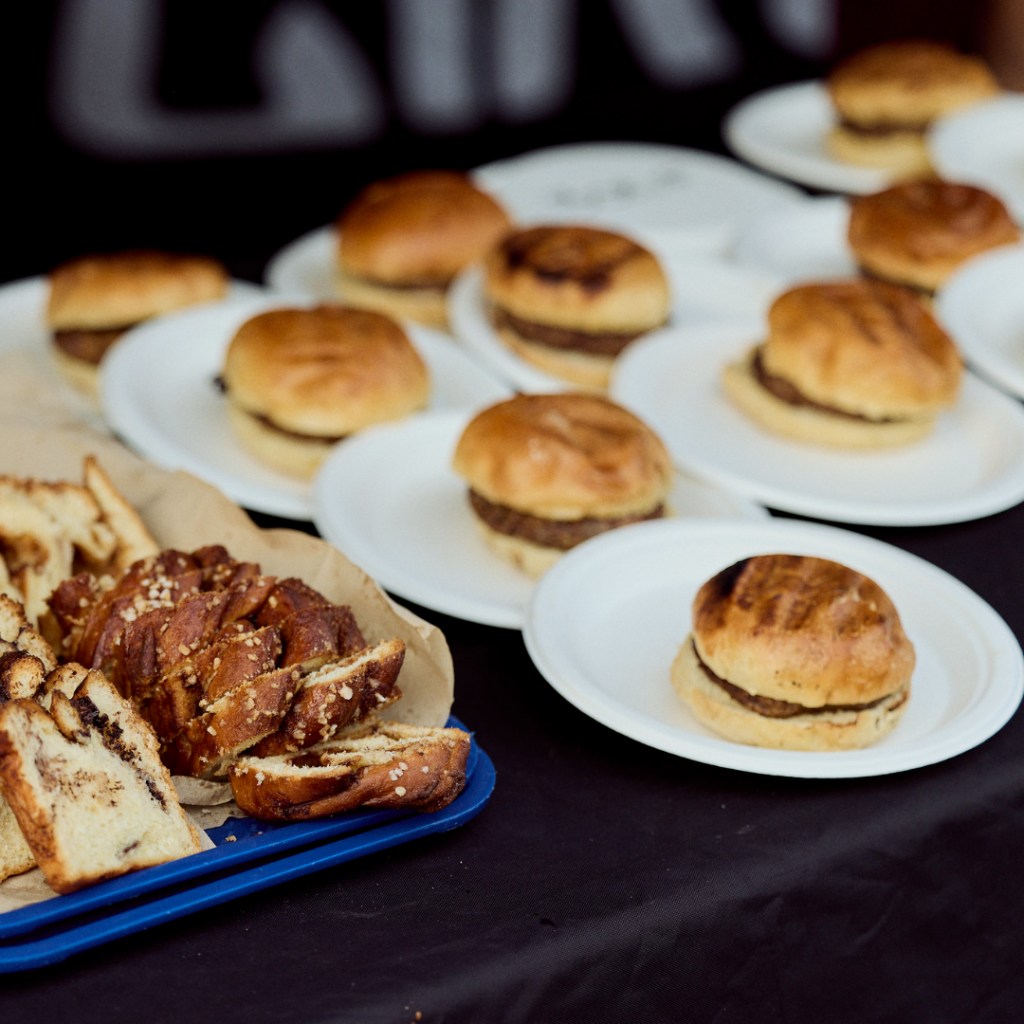
    Ce n’est pas tous les jours que tu te fais cuisiner des pâtes la veille de ton départ par l’équipe des organisateurs, et qu’on t’accueille avec des burgers après avoir franchi la ligne d’arrivée.

    Pendant la course

    Le départ en pleine nuit était une des raisons pour laquelle je voulais participer à l’évènement. Évidemment, chacun à ses objectifs, j’avais envie de me dépasser. Cette année a marqué un tournant important pour moi. Je n’ai pas participé à une seule course sur route. Pas de critériums, pas de Lachine. rien. J’avais envie d’essayer des choses que je n’avais jamais faites avant.

    Alors si vous cherchiez un moment pour faire de l’introspection; une course de 300km c’est un bon prétexte.

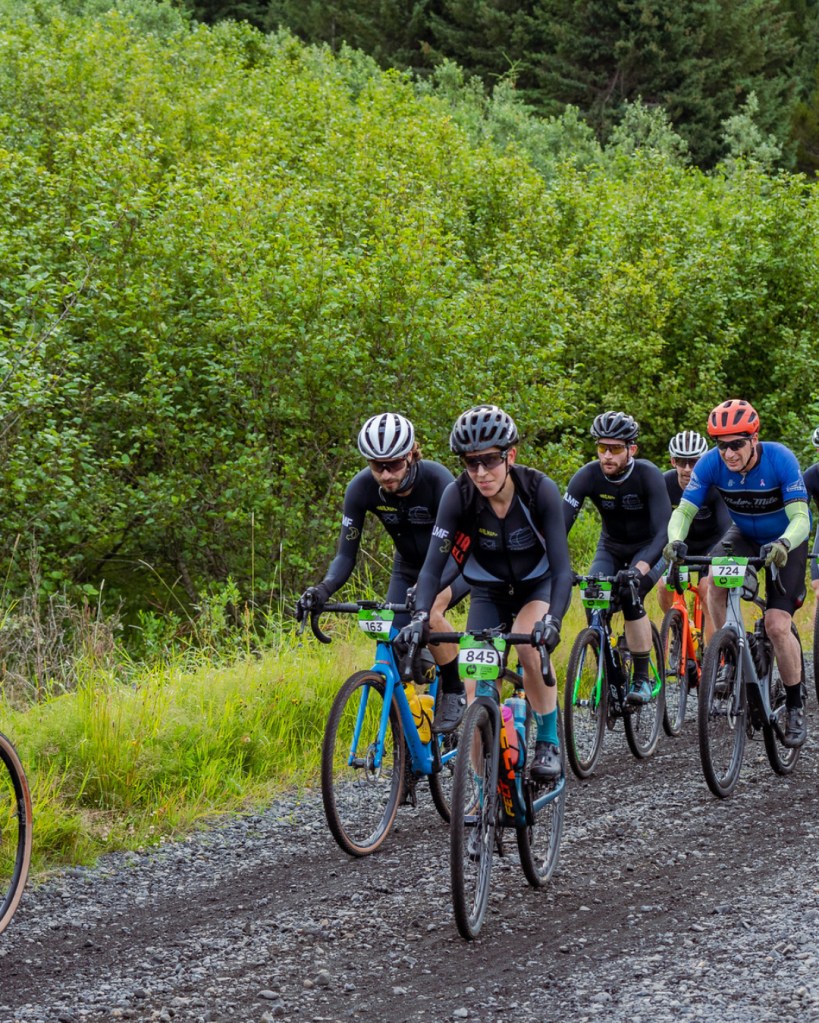
    Avec un départ aux 30 secondes, on rattrape rapidement des gens, et on se fait aussi rapidement dépasser. La première heure était ludique. Chacun entre dans sa zone, trouve son rythme. Il y avait des petites lumières rouge à perte de vue dans l’obscurité. Parfois, j’éteignais ma lumière de casque pour prendre la mesure de la nuit.

    Le lever du soleil était perceptible peu de temps après le départ. Ensuite, il y a eu la rosée, le brouillard, et le soleil qui finalement annonçait une journée exceptionnelle.

    j’avais planifié mes arrêts de façon méthodique. St-Côme, un dépanneur juste avant St-Donat, le marché Richelieu à la sortie du Nordet, Ste-Lucie des Laurentides, St-sauveur.

    Chaque arrêt confirmait que ma préparation était bonne et ma journée bien planifiée.

    On croise de tout pendant 300km. il y a quand même eu des longs bouts où je ne rattrapais plus personne. Et puis, avec le nordet à faire, je savais que j’allais me faire rattraper dans cette portion du parcours.

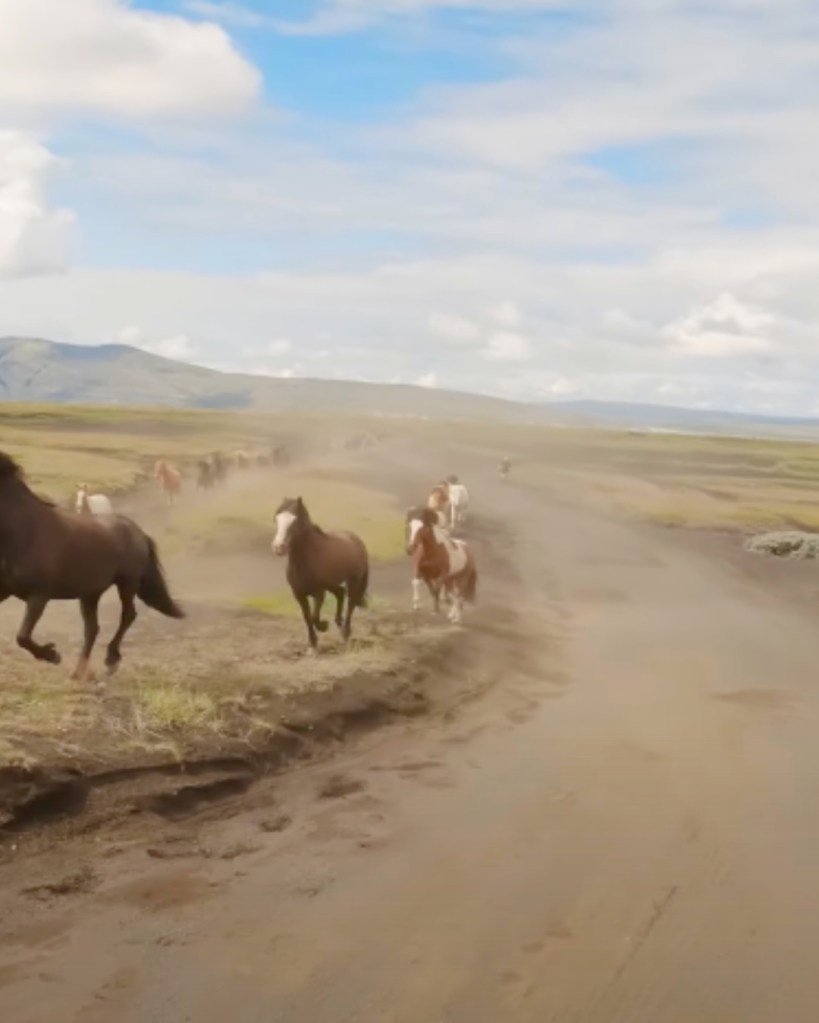
    Il y a eu les arrêts dépanneurs, où j’ai croisé d’autres participants, partagé des chocolatines et de l’eau, puis des animaux, des chauffeurs de pick-up qui t’emboucanne, un peu de tout finalement.

    Mais tout allait bien. Pas de crampes, pas de maux d’estomac, pas de délires, pas de bonk. Le Garmin fonctionne, les vitesses changent, pas de flat. tout va bien.

    Le Bonk

    He oui. Tout allait bien, en voie de faire un top 10. Puis à 315 km, le mur.

    Je bonk solide comme on dit. Avec le recul, tout ce dont j’avais besoin c’etait d’un gel. Je n’en prends jamais, mais en fin d’épreuve comme ça, quand tu as tout fait comme il faut, mangé et bu selon le plan, il me manquait le ptit boost sucré qu’un gel peut donner.

    Comme quoi je n’avais finalement pas tout prévu. (qui prévoit bonker au milieu de la Trans-Terrebonne.. personne)

    Pour éviter le Bonk, j’avais planifié mon hydratation avec le Skratch Lime en sachets (plus facile à transporter) et des jujubes Skratch. À chaque heure, je prenais une bouchée de barre ProBar chocolat.

    Dans mes 2 premiers bidons de 700ml, il y avait une généreuse scoop de sirop d’érable (pour les calories).

    La stratégie était déterminée d’avance, en programmant mon Garmin pour me donner des alertes aux 10 minutes pour l’eau et 20 minutes pour la bouffe.

    Probablement que pour mon premier 300km (325) un ptit bonk à 10 km de la fin c’est pas si mal.

    Les produits Skratch sont disponible sur le site de Trackloft: Skratch Lab

    L’arrivée

    Quelle sensation de descendre le petit sentier au milieu du bois du PAT vers l’arrivée! Incroyable.

    Il y a toujours un doute, surtout après avoir frappé le mur, qui laisse croire qu’on ne verra pas la fin. Et tout se dissipe rapidement. On ne compte plus les km, ni le temps, on se laisse aller parce que l’arrivée est si proche.

    C’est un beau moment. Et puis il y a toutes ces personnes à la ligne d’arrivée. On ne sait pas qui ils sont, mais je le redis, la communauté ultra est incroyable. Chaque coureur qui descendait vers la ligne d’arrivée reçevait des encouragement de tout le monde, même ceux qui tentaient de dormir. Tout simplement énergisant.

    À l’arrivée, on prends la photo officielle et les moins officielles. On reçoit des félicitations… on perd un peu le fil de ce qui arrive.
    Un état second peut-être.

    Sans y croire, j’enfile un burger, 2-3 coke/pepsi/canada dry et même un jus de pomme.

    Les participants discutent, échangent à propos de leurs péripéties, de leur trajet, ce qu’ils ont vu, entendu et ressenti.

    L’ultra-cyclisme proposé par Race Across Québec; c’est tout simplement génial.

    Il faut le vivre et le partager.

    Le skinsuit Gravel Mafia, Les chaussettes aero et la nutrition sont tous disponible sur Trackloft

  • Prevent the Bonk

    Prevent the Bonk

    What is Bonking?

    Not eating and drinking (good) enough. Dangers and prevention.

    You know that friend that always drops off the ride because he’s hungry. Or that friend who’s black cycling jersey turns white because he’s loses a lot of salt? Well send them this article, because we are going to cover those subjects.

    The Bonk

    Generally, Bonking arrives when an athlete does not fuel enough during a prolonged activity.
    Meaning, they’ve completely depleted their reserve of Glycogen without replenishing it during the activity.
    This can be quite dangerous and lead to unwanted results, ranging from going back home in a taxi to going to the hospital in an ambulance.

    No need to panic here, an extreme Bonk is rare and hopefully you will notice the signs before.

    Some people will refer the normal form of bonking as ”hitting the wall”. A friend of mine says he’s made it to Bonkcity. However you want to call it, here are signs you are bonking:

    • General feeling of fatigue, not just in the legs.
    • Feeling flat, energy less.
    • Craving food, sugar, salt, ( when fast food is the first thing that comes to your mind…).

    Getting out of that Bonked state can be possible. But do not expect a quick 5 minute break to be enough. You will need food, rest and probably a nature break.

    Prevent the Bonk

    The main role of carbohydrates is to provide energy to muscles and some vital organs. Meaning, not managing that during any sport activity or competition will most probably lead to your downfall.

    It’s a tough ordeal to find the right combination of food, drinks and energy output management to prevent the Bonk.

    Many articles will state that you must manage your food/carbs consumption to be anywhere between 30gr to 90gr of carbs per hour.

    You can decide to do so with only food, or a mix of food and sports drinks. One of the main difficulty is to find a balance between any type of food or drink you are using for training or for a competition. Basically, you need to test and discover, most of the time through a long trial and error method, what product works best for you.

    Not only will you start reading nutritional facts for sport specific food, but you will most probably start doing so for day to day food and drinks.

    If there is only one thing to remember from this whole article, it would be this: before any competition, make sure you test the product you want to use during said competition. Just like with new components, gear, apparel, etc.: never race new $h!t.

    Once you’ve found the food, bars, gels, energy blocks etc. that work for you and that don’t upset your stomach, you can start calculating how much of it you need to eat during any activity.

    You should also calculate the nutritional values of whatever sport drink you are planning on using. And if you were planning on running on water, think again. Let’s talk about it right now.

    *Important disclaimer: I am not a nutritionist, dietician or medical expert. In most countries, those professions are governed by a professional order that makes sure the public gets protected. In all good faith, I am simply trying to offer my perspective and my experience with sports nutrition.

    If you feel like you need more information, you can dive in and google articles and reviews about sports nutrition at will. Or consult a professional.

    Why drinking water isn’t enough for endurance sports and long distance cycling.

    Hyponatraemia

    Hyponatraemia happens when the amount of sodium in your blood is too low. In endurance sports, it can be caused by excessive hydration. This loss of salt, or sodium deficiency, can cause your body to shut down and it extreme cases, it can cause brain swelling, confusion, seizures, or even death.

    How it happens:

    • Drinking water far more than you need
    • Sweat a lot resulting in high sodium loss.
    • Unawarely diluting your body’s salt levels too much

    Serious symptoms that can result from Hyponatraemia

    • General body discomfort
    • Vomiting
    • Headaches and confusion
    • Coma

    The Role of Electrolytes in Sports Performance

    Electrolytes are minerals in your body that carry an electric charge and are crucial for:

    • Efficient muscle function by replacing lost electrolytes during activity like: sodium, potassium, magnesium, and calcium.
    • Neuro-muscular efficiency.
    • Hyponatraemia prevention. (Sodium and potassium help regulate the amount of water inside and outside your blood cells.)
    • Preventing cramping and fatigue. (Low electrolyte levels can lead to muscle cramps and general body weakness)

    Most hydration powders can compensate electrolytes loss.

    Hyponatraemia prevention

    Most articles about sport nutrition and hydration will state that a minimum of one liter of water per hour is required to insure proper hydration.
    Now that we know that drinking only plain water is not good, let’s add the recommended dose of electrolytes to our water bottles.

    As an example, I use Skratch Hydration mix. Skratch recommends 1 scoop of 22gr of powder per 450/500ml of water.

    The result in terms of energy intake is:


    Calories80
    Fat0
    Carbohydrate20g
    Protein0
    Sodium400mg
    Potassium50mg
    Calcium50mg
    Magnesium50mg
    vitamin C18mg

    Just randomly drinking water with Electrolytes isn’t enough to maintain sodium levels. Make sure you keep in mind that.

    • Drink regularly, don’t wait to be thirsty.
    • Set timed alerts for food and hydration on your Cycling Computer.
    • Include salt in your food intake like Soups or salty snacks.
    • Avoid salt capsules as some studies doubt they are effective for prevention and can be risky.

    Essentially, during any activity that goes over an hour, or in hot conditions, only drinking plain water can increase the risk of Hyponatremia. Adding electrolytes to your water reduces that risk.

    What about energy gels?

    Energy gels primarily provide quick carbohydrates for fuel during prolonged exercise. Some gels also contain electrolytes, but their main role is to:

    • Maintain blood glucose levels.
    • Prevent early fatigue or even compensate for late fatigue (some gels have caffeine).
    • Provide quick and easily digestible energy.

    Gels can help you with keeping a good energy level through your activity or provide sudden energy needs, while electrolyte drinks helps hydration beyond what water can provide.

    Of course, a lot or people use both in combination, plus a regular intake of carbs.

    Nutrition Strategy

    Before copying an existing nutrition strategy that someone told you about, make sure that you have tested the ingredients before. try alternatives that match your tastes and budget.

    In my case, here is part of my nutrition strategy. It sometimes vary depending on weather, my physical condition and availability of products.

    For my Electrolytes needs, my go to is the Skratch Hydration Powder.

    I find it easy on the stomach and easy to drink. I have never had difficulty diluting it in water even when trying double-dosage.

    They offer many flavours, but I stick to Lemon + Lime.

    • any ride: I mix 1 serving cup with 550ml of water + 550ml of water in another bidon.
    • Long endurace rides:
      • I mix 1 serving cup with 550ml of water
      • I mix 1 serving cup with 700ml of water and I add maple syrup for more carbs.
    • I’ll eat 1 energy chew every 20 minutes for a total of 100 calories and 24gr of carbs over an hour.

    Here is what I would consider to be my hourly intake on a long distance bike ride or event.


    Skratch Hydration 22grSkratch energy chews 10grMaple Syrup Mix 60ml + 22gr Skratch Hydration
    Calories8032220
    Carbs20gr7,6gr54gr
    Sodium400mg18mg0mg
    Potassium50mg4mg200mg

    Keep in mind that any hydration mix of electrolytes is not a one stop shop for your energy source. It has a specific purpose but you need to eat on top of that. I rarely use energy gels but I’ll have real food and energy blocks so I can maintain some sort of performance.

    The main objective of a balanced nutrition stragegy is to prevent Bonking and hyponatremia at the same time.

    What about Gatorade and similar drinks?

    That is a good question. the only answer I have for you is: if it works for you, go ahead and use those products.

    In my case, I can’t drink half a bottle without feeling bloated and it considerably affects my performance in a negative way. I suddenly feel heavy, bloated, and it takes hours for my body to return to normal. I don’t know what in the composition of those beverages makes me feel that way. I wish I could tell you more.

    It’s no-go for me. But I am not saying this is not a viable alternative.

    Please do your own research about these products.

    A Banana?

    Many cyclists carry a banana with them. When 3D printing started, people made all sorts of Banana carrying devices.
    Is a Banana really good for endurance cycling? What are the pros and cons?

    With about 27gr of Carbohydrate per fruit; the Banana can be a good source of energy. With high levels of Potassium, it can help replace some electrolytes lost in sweat.

    Is it most and foremost a natural alternative. It can sometimes complement gels by adding variety to your diet and reduce processed sugar intake.

    Most athletes find it easy to digest, but timing consumption is a must to avoid possible gastro intestinal discomfort.

    The main drawback of the Banana is finding a way to transport it.

    Here is a comparison table showing Skratch electrolyte powder, Gatorade Gatorlyte , Energy gels and a Banana

    1 scoop of Skratch Hydration Powder (in 500ml of water)Gatorade Gatorlyte (591ml)Energy Gel (32gr)1 Banana
    Why use it?Hydration & electrolyte replacementHydration & electrolyte replacementRapid carbohydrateit’s good food
    Calories8050100105
    Does it have electrolytes?Sodium: 400mg
    Potassium 50mg, Magnesium 50mg
    Calcium 50mg
    Sodium: 490mg
    Potassium: 350mg
    Magnesium: 105mg
    Calcium: 120mg
    Sodium: 60mg
    Calcium: 30mg
    Potassium: 422mg
    Carbohydrate 20gr14gr21gr27gr
    Ideal forSerious training and competitionBack-up solutionQuick energy intakeReal food intake
    Sources: skratchlabs.com / pepsico.info / guenergy.com / Canada gov

    Planning a Nutrition Strategy is for you if

    If you are an avid endurance athlete or enthusiast, you need to consider a sport specific food and drink intake. At least while you are doing your activity. It could prevent immediate and delayed health issues while also potentially help you achieve better performances.

    Every year, when I am out on bike tours and bike rides I meet athletes that hit the wall. And I wish I could have shared some knowledge with them prior to seeing them crumbling on the side of the road, 40km away from the hotel or home.

    If bonking is not something you experience ever, perhaps you found a strategy that works for you. Be a sport: Grab a few extra gels or bar and keep them handy to help your fellow (Bonked) Cyclist.

    Looking for Skratch Products in Canada?

    You can order them directly from TRACKLOFT or find them at your local bike shop.


  • Test de résistance au roulement des pneus de gravel.

    Test de résistance au roulement des pneus de gravel.

    Enfin un test de pneus de gravel.

    Trouver le bon pneu de gravel est un défi de taille. il y a tellement de choix, de paramètres, que cela peut devenir difficile de prendre une décision.
    On peut choisir un pneu selon plusieurs critères. La résistance au roulement en est un. On peut aussi choisir un pneu de gravelle en fonction de sa fiabilité, son poids, sa facilité d’installation, le confort, son profil de crampons, le style et la couleur.

    Je me suis donc lancé dans ce projet ambitieux, afin de tester 3 modèles de pneus de gravel afin de déterminer lequel est le plus rapide, ou du moins, celui qui offre la moins grande résistance au roulement sur une surface de gravelle.

    Il existe quelques tests similaires, la plupart fais en laboratoire mais je n’en ai pas trouvé qui ont été fait dehors et sans biais de commandites ou de lien affiliés.

    Les pneus testés aujourd’hui:

    • Continental Terra Speed. 700×45
    • Vittoria Terreno Dry. 700×40
    • Panaracer GravelKing X1 2024. 700×45

    J’ai choisi ces pneus pour les raisons suivantes:
    -Le Vittoria Terreno Dry est équipé de série sur plusieurs vélo, il est donc plutôt commun.
    -Le Terra Speed a toujours été très populaire depuis sont lancement et est maintenant offert en 700×45, ce que beaucoup attendaient avec impatience. Il a la réputation d’être le pneu cramponné le plus rapide sur le marché.
    -Le Gravel King de Panaracer est un des premiers pneus de gravel ”mainstream” et la nouvelle version méritait d’être testée. C’est un pneu souvent négligé, pour plusieurs raisons. On va voir si cette nouvelle version,le X1, deviendra populaire grâce à son nouveau design de crampons. Vous pourrez lire mes premières impressions dans un autre article bientôt.

    Le test

    Il a fallu un avant midi complet pour tester les 3 pneus (en paire évidemment). J’ai donc installé 3 paires de pneus dans le stationnement du parc Frédéric Back avec une pompe réservoir (la Lezyne Pressure Overdrive). C’était un peu sportif!

    La pompe Pressure Overdrive de Lezyne
    La gauge digitale Honest de Blackburn

    Voici comment j’ai testé les 3 pneus.

    • Le montage a été fait sur la même paire de roues.
    • Largeur interne 27mm.
    • Jantes en carbone Hookless.
    • J’ai utilisé un insert dans chaque pneu.
    • Montage tubeless évidemment, avec 30ml de scellant dans chaque pneu.

    J’ai ensuite fais une multitudes de boucles du parc, donc 5.35km par tour, en respectant les conditions suivantes:

    • Un premier tour à 25km/h avec 29psi dans chaque pneu.
    • Un deuxième tour à 30km/h avec 29psi dans chaque pneu.
    • Un troisième tour à 30km/h avec 26psi dans chaque pneu.
    • Le capteur de puissance a été fréquemment calibré.

    Résultats

    Le Continental Terra Speed porte bien son nom. J’ai eu du mal à respecter la vitesse de 25km/h que j’avais planifiée pour le premier test. Et je n’ai presque pas perçu la différence d’effort requis pour passer de 25km/h à 30km/h.

    Comme c’était le premier test de la journée, supposons que j’avais de bonnes jambes.

    C’est donc le nez collé à mon Garmin que j’ai fait mon premier test.

    Le profil de crampons minimaliste.
    Le Continental Terra Speed avec flancs beiges.


    Voici les résultats:

    25km/h à 29psi:

    • Moyenne: 25.84km/h
    • Moyenne: 156 watts
    • Moyenne normalisée: 195 watts
    • Temps: 12:35
    • Temps en position assise: 12:27

    30km/h à 29psi:

    • Moyenne: 30.86km/h
    • Moyenne: 226 watts
    • Moyenne normalisée: 255 watts
    • Temps: 10:30
    • Temps en position assise: 10:16

    30km/h à 26psi:

    • Moyenne: 30.91km/h
    • Moyenne: 226 watts
    • Moyenne normalisée: 255 watts
    • Temps: 10:30
    • Temps en position assise: 9:47

    Malgré une bande de roulement aux apparences symétriques, le Continental Terra Speed est bel et bien directionnel.

    Il faut donc l’installer dans le bon sens de rotation pour en tirer le maximum de performance et de rendement.

    Conclusions

    Le Continental Terra Speed est un pneu très rapide. En effet, selon le site tirerollingresistance.com; le Terra Speed en 700×45 est plus rapide qu’une multitude de pneus de route lisses, et ce malgré la présence de crampons.

    Il faut avouer que la taille des crampons est plutôt petite. Et les crampons latéraux ne permettent qu’une faible accroche latérale. D’ailleurs, déception, le 700×45 mesure 43 sur mes jantes, qui font pourtant 27mm de largeur interne. Je suspecte que le pneu s’écrase, à basse pression, et adopte sa largeur réelle ainsi.

    Par contre, la traction et l’adhérence peut être obtenue en réduisant la pression, ce qui permet au pneu de se déformer et de mieux épouser terrain. Il n’y a aucune pénalité à réduire la pression sur le Continental Terra Speed et c’est ainsi que vous en tirerez le maximum.

    Qui sait si la résistance de roulement ne serait pas identique à une pression encore plus basse. À vous de tester!


    Vittoria Terreno Dry

    Le Vittoria Terreno Dry, présenté ici dans sa version 2.0, est un pneu relativement passe-partout et efficace. Un look sobre, un design de crampon hybride, avec accroche latérale cramponnée et une bande de roulement relativement lisse.

    On remarque, visuellement, que la bande de roulement est relativement épaisse, ce qui met en confiance coté résistance aux crevaisons.
    Depuis que Vittoria a adopté le standard ETRTO, leur pneu sont devenus très facile à installer en montage Tubeless et sont très fiables.

    Surprise, Le 700×40 mesurait 42 sur mes jantes. C’est aussi le seul pneu avec un profil relativement ”carré”, qui s’écrase à plat sur le terrain, comme un boyaux.

    On remarque le design polyvalent du Terreno Dry.
    Le Terreno Dry avec flancs beiges.

    Voici le tableau des résultats.

    25km/h à 29psi:

    • Moyenne: 25.89km/h
    • Moyenne: 163 watts
    • Moyenne normalisée: 189 watts
    • Temps: 12:16
    • Temps en position assise: 12:29

    30km/h à 29psi:

    • Moyenne: 30.64km/h
    • Moyenne: 236 watts
    • Moyenne normalisée: 261 watts
    • Temps: 10:34
    • Temps en position assise: 10:25

    30km/h à 26psi:

    • Moyenne: 30.58km/h
    • Moyenne: 243 watts
    • Moyenne normalisée: 266 watts
    • Temps: 10:31
    • Temps en position assise: 10:25

    Le vittoria Terreno Dry est aussi un pneu qui a été conçu avec un sens de rotation.
    On peut facilement voir les crampons latéraux, qui donnent au pneu son caractère rassurant en virage.

    Conclusion

    Le Terreno Dry de Vittoria est un excellent pneu ”all-around” qui cependant, donne des résultats de résistance au roulement un peu plus élevés que le Terra Speed.
    C’est aussi le seul pneu dont la résistance au roulement augmente en réduisant la pression.

    Par expérience, ce pneu est aussi très lent sur l’asphalte à une pression de 29psi ou moins. Malgré cela, c’est un pneu qui mets en confiance et qui est prévisible.

    Compte tenu que les championnats du monde de gravel ont été remportés avec le Vittoria Terreno Dry, il serait intéressant de tester la résistance au roulement à des pressions plus élevées.


    Panaracer Gravel King X1

    Je découvre le Gravel King dans sa nouvelle mouture, qui apparemment est plus raffinée, plus rapide et qui propose un cramponnage amélioré.
    Le Gravel King est un classique devenu peu populaire car beaucoup de pneus plus modernes ont pris le marché d’assault et l’engouement pour ce pneu Japonais s’est estompé au fil du temps. La première version était aussi relativement capricieuse à l’installation et exigeait patience et détermination lorsqu’on voulait le monter Tubeless. De plus, le pneu avait la réputation de projeter les petits cailloux qui se coinçaient entre les crampons vers l’arrière, ce qui rendait l’expérience plutôt pénible pour les cyclistes autour.

    Le design élaboré de crampons du X1
    Une étiquette plutôt jolie. Fait au Japon.

    Voici les résultats.

    25km/h à 29psi:

    • Moyenne: 25.89km/h
    • Moyenne: 156 watts
    • Moyenne normalisée: 185 watts
    • Temps: 12:36
    • Temps en position assise: 12:00

    30km/h à 29psi:

    • Moyenne: 30.43km/h
    • Moyenne: 227 watts
    • Moyenne normalisée: 255 watts
    • Temps: 10:32
    • Temps en position assise: 10:13

    30km/h à 26psi:

    • Moyenne: 30.85km/h
    • Moyenne: 224 watts
    • Moyenne normalisée: 247 watts
    • Temps: 10:28
    • Temps en position assise: 10:06
    La flèche qui indique le sens de rotation.

    Le pneu Gravel King X1 est aussi directionnel. Malgré la taille minimaliste de la flèche, le design de crampon permet tout de même de facilement deviner le sens de rotation.

    Le Gravel King X1 s’est avéré le pneu le plus difficile à installer.

    Conclusion

    Le nouveau Gravel King est un pneu surprenant! Confortable et prévisible, offrant une accroche latérale surprenante. Idéal pour ceux qui recherchent un pneu qui mets en confiance, particulièrement en virage sur gravelle douce.

    En chiffres: ce pneu, comme le Terra Speed, s’est avéré un peu plus rapide à plus basse pression. La sensation à plus basse pression était excellente. On peut sentir le pneu se déformer et mordre dans la gravelle ce qui donne cette sensation rassurante et prévisible.

    Je n’ai pas eu le temps de tester la gomme sur l’asphalte, alors je mettrai à jour cet article éventuellement.

    Aussi, Il semblerait que Panaracer a amélioré son design de crampons: le nouveau Gravel King ne lance (presque) plus de cailloux vers l’arrière.


    Et le gagnant est…

    Considérant l’infime écart qu’il y a entre chaque modèle, est-ce réaliste de déclarer un gagnant? Probablement pas.

    Après tout, ce test n’est probablement pas le plus fiable, puisqu’il faut prendre en compte le vent qui varie constamment, l’achalandage des autres usagers du parc, puis ma fatigue cumulée au fil des tests qui influence ma perception.

    Si on observe seulement les données obtenues (en watts), on peut classer ex-aequo, au premier rang, le Continental Terra Speed et le Panaracer Gravel King.

    À prendre avec des pincettes.

    Plus de Graphiques!

    Comparaison des courbes de puissances à 25km/h – 29 psi
    Comparaison des courbes de puissances à 30km/h – 29psi
    Comparaison des courbes de puissances à 30km/h – 26psi

    Comparatif final (non-corrigé)

    Panaracer Gravel King X1

    • Moyenne: 30.85km/h
    • Moyenne: 224 watts
    • Moyenne normalisée: 247 watts
    • Temps: 10:28
    • Temps en position assise: 10:06
    • Facilité de montage:
      3/5
    • Taille annoncée: 700×45
    • Taille mesurée: 700×44

    Continental terra Speed

    • Moyenne: 30.91km/h
    • Moyenne: 226 watts
    • Moyenne normalisée: 255 watts
    • Temps: 10:30
    • Temps en position assise: 9:47
    • Facilité de montage:
      3/5
    • Taille annoncée: 700×45
    • Taille mesurée: 700×43

    Vittoria Terreno Dry

    • Moyenne: 30.58km/h
    • Moyenne: 243 watts
    • Moyenne normalisée: 266 watts
    • Temps: 10:31
    • Temps en position assise: 10:25
    • Facilité de montage:
      4/5
    • Taille annoncée: 700×40
    • Taille mesurée: 700×42

    Comparatif du data à 30km/h – 26 psi

    Note importante.

    Je dois souligner que la paire de Vittoria Terreno Dry et les inserts vittoria, ainsi que le scellant, m’ont été offerts par Vittoria. C’est en partie grâce à leur aide que j’ai pu faire ce test.

    Les autres pneus ont été acheté en boutique (localement).

    Jamais Vittoria n’a eu d’influence sur le contenu produit, soit écrit ou visuel.

    J’en profite tout de même pour les remercier de leur confiance et leur support.

  • The Rift – the Icelandic bike adventure (part 1)

    The Rift – the Icelandic bike adventure (part 1)

    When Gravel cycling was still a marginal thing, (that is before Gravel became the new Fixie, aka before Gravel events became the Pros retirement plan) I came across this unique cycling event and I was hooked right away. My first thought was… cycling in Iceland? In Fact, I knew very little about Iceland, besides the usual. I did not even think there was a cycling scene over there.

    One day, GCN covered The Rift and I knew right away, after watching the video, that I had to attend one day. It sure felt like this event would become an unforgettable experience in one of the most breathtaking place on Earth.

    As Iceland is nicely situated between Canada and Europe, the event attracts people from everywhere and in growing numbers. The 2021 event had 200 participants and the 2023 version more than 500. (for the 200km distance)

    And the fact that Iceland has the potential to be cold, windy, covered with snow at any time of the year made it more attractive, even though I absolutely despise Canadian winters. It just felt like this could be a great event and a great cycling adventure.

    What makes The Rift special?

    The Rift is not your average gravel bike race. It covers a distance of 200 kilometres through the rugged terrain of Iceland, including lava fields, glaciers, and volcanic landscapes. There is a pretty cool portion where you ride down a snow covered Volcano. Riders must navigate gravel roads, Uber cold river crossings, and challenging climbs, some you can only go up by walking. All that, and much more unpredictable events and weather making the Rift a true test of skill and endurance. In 2022, a pack of wild horses ran beside the riders in a valley… it was spectacular.

    My friend Max crossing a river during the 2022 edition.
    The same river crossing a few minutes later. Heavy rain and high winds quickly replaced the sunny weather.
    My friend Charles got this shot while riding.

    In a matter of a few minutes, you can be riding under a sunny sky, shortly followed by a sudden and heavy rain fall or Hail, strong winds which of course will always be against you. The first 100km are going up. Not by much, as the total elevation is 2165m but most of the climbing is within the first half. Let’s just say that after 180km, the final remaining inclines hurt. A lot.

    More about the terrain and the course later.

    How can you prepare for The Rift?

    Well, that comes down to preparation. I’d sum this up like this: There are different aspects you need to prepare to succesfully complete The Rift. To tackle The Rift without suffering too much, you must be in a close to top physical condition. Additionally, you must have the right gear. Finally, you must manage your food intake regardless of the weather conditions.

    1- Training

    Training for long-distance gravel riding is something you should consider hiring a coach for. At least consider it. I know that modern cycling trends are pushing cyclist to ride longer and longer than ever. But still, 200km of road biking and 200km of gravel in Iceland is quite different.

    2- Bike and Gear preparation

    Obviously, if you travel all the way to Iceland with your bike to participate in a potentially once in a lifetime event, you must make sure your bike is in top condition. Duh.

    The Bike Stuff

    On top of having a bike in perfect condition, you must get familiar with how your bike works, what kind of parts are on it and have a minimal knowledge of how to fix it. Honestly, this is something The Rift organization does not mention enough in their Race guide.

    The Rift is a long event, you will be in the middle of nowhere, with little to no cellular coverage. You must be ready to fix almost anything on your bike, on your own. So learning how to fix a flat tire, repair a broken chain, install a tube in a torn tubeless tire, quickly bend back a disc, align your stem/handlebar assembly are just a few of the mechanical operations you should know how to do. You might have to perform any of these under conditions that are not the best. Imagine having to fiddle with a chain tool with frozen hands in windy and snowy conditions… I really do not want to scare anyone, but better be prepared than not.

    River crossing is pretty fun, but it can also mean the end of your ride if you crash on the derailleur side and break drivetrain components.

    In 2022, my first and only participation, I repaired 3 punctures (not even mine) and fixed a ben rim with a can opener and a volcanic rock. I had Tubeless sealant all over my gloves and rode 80km with a tubeless insert around my back. I helped a pro rider who had 8 punctures and needed a new wheel (I don’t know how he got a new wheel to finish his event). I mean… come one dude. That guy was not ready. Make sure your bike is in good condition and ready for a 200km gravel ride.

    Then, you must prepare your spare parts and repair kit. In essence, I strongly recommend that you pack these things, add more if you need more, but these would be the essentials:

    -Spare Derailleur Hanger
    -Chain breaker
    -Quick link
    -Multi-tool
    -Some sort of tubeless Repair kit (plugs and tire patch)
    -Mini-pump and Co2 cartridges.
    -Ultra-light spare tubes. The new Pirelli tubes are great. Super light, very compact. Worth the very expensive price.
    -Spare valve core
    -Small knive

    Once you got your repair kit ready, practice repairing stuff on your bike with it. It will be worth it.

    The riding Gear

    Finding the right clothes to wear for an event where about every type of weather conditions are expected is a challenge.

    If you are like me, IE not an outdoor, trekking, camping and mountaineering specialist, you will need to find the right gear to be comfortable and ready for anything. Which means understanding rainproof materials, merino wool, and find the best clothing you can for the budget you have. One great thing about The Rift is that they allow you to pack a small bag, which most people refer to as the ”sock bag”, that they will bring up to the 3rd feed (at 100km). Prior to the start, you can drop your bag, containing whatever you filled it with, in a huge truck. Unless you plan on winning the race as a Pro or in your age category, I’d strongly recommend taking advantage of this.

    The 100km feed (3rd) where you can grab your spare socks bag.
    Long sleeve skinsuits are excellent for the Rift.

    Typically, you would put in there a pair of warm socks (perhaps the ones the organization provides with each entry), spare gloves, maybe some food and a dry Buff. If you left with too much stuff, you can drop it in the bag and recuperate it at the end of the event. Whatever you think you need, put it in there. Better pack that bag with loads of stuff you won’t use than regret not packing it later. You could even cram a spare tube in there just in case.

    Because the weather changes so much, your clothes must allow you to ride comfortably in all those conditions. You will cross many rivers, walk up steep hills, run in loose snow and much more. So there is little you can do against all that. Compromise is key, I guess.

    Here are the clothing accessories that I think are essential:

    -Super light packable Gore-Tex-ish jacket.
    -Well padded long finger gloves
    -Super light short sleeve vest
    -Long socks of any type
    -Good Gravel/mountain bike shoes
    -Breathable Base layer
    -Photochromic lenses
    -Gravel/adventure style bib shorts (for their side pockets)

    Be ready for anything and everything. My Gore rain jacket perfectly fits in my toptube bag, making it easy for me to grab it and put it on while riding.
    3- Nutrition

    Again, a no brainer. To make your way through 200km of gravel cycling, you will need a considerable amount of fuel. One thing the organization has dialled in are feed zones. Man, there is all you can think of at each and every feed station. The thing is, it’s mainly junk food. I am not saying it’s bad, but think of the feed zones as a safety feature if ever you packed less food than necessary.

    Nothing is worst than hitting a wall at 120km knowing you still have 80 to go… (remember that last hill you must climb near the end I was talking about earlier?)

    So part of your training before the event will consist of finding the right food for that kind of distance and time spent on the bike. Can you tolerate it well? Is it easy to digest? Is it home made or pre-made? How do you eat it while riding? Where do you store it? etc.

    And the other thing to consider is that the food you are used to eat and train with might not be the food you need in this type of weather.

    My advice is, try to eat ”real food” as much as you can and keep the gels and bars and energy chews to top off your energy needs.

    And train using the bars, gels and other similar food you plan to use for the event.

    Circling back to the 100km feed and ”sock bag” truck: this feed station will also have Sandwiches of many different types. Which came as a huge relief for me.

    I am by no means a Nutrition expert but if you want to plan ahead, there are common food intake guidelines and formulas you can use. Those can easily be found online, but search for trustworthy sources and consult a certified Dietician/Nutritionist if you are in doubt. After all, incorrect food intake can lead to dangerous health issues. Don’t neglect that.

    End of part 1

    In the next part, I’ll present you with more gear for your bike and for yourself. I’ll talk more about the course itself as well.

    Almost there! The last banner seconds before you cross the finish line.
  • Velobike Skat Endurance Handlebars Update

    Velobike Skat Endurance Handlebars Update

    As far as I know, the Velobike Skat Endurance Handlebar is the first modular handlebar on the market.

    By modular, I mean that it can be adapted to offer different types of hand positions and (to be confirmed) to different aerodynamic characteristics.

    The Grip-C

    When I originally purchased this handlebar, it came with the Grip-B, which are fine, but I wanted the grip-C, that seems to offer a better grip and safer position by locking your thumb onto the grip. the grip-C finally arrived and I went on to install them.

    The Velobike Skat handlebar with Grip-B
    The Grip-C with Grip-B in background
    Installation

    All these grips can be easily removed by using an hex key. Well in fact, you need 2 sizes: 2.5mm and 3mm. If I was the type to change my grips depending on what event I was attending, I’d really wish only one hex key size would allow to remove all the bolts.

    After fiddling a bit, I can recommend that if you have to replace your grips, get the top bolt snug before the front one. when I did the opposite, the top bolt was not going in easily, as it was rubbing against the grip itself. Seems like the top hole position could be moved forward by perhaps 1mm…

    The installation is still easy and everything perfectly fits. It’s just me being picky considering the high price of this handlebar.

    Comfort

    Well, I was quite surprised. the Grip-C has a quite sharp edge where the thumb rests. I think I was hoping for something a little more ”round”. I added some Zefal Coton Tape to provide some grip and comfort.

    Most pictures I have seen online from athletes using these showed that the grips are actually used as some sort of aero extension rather than ”brake hoods”. It’s only a matter of time before the UCI reacts and bans that kind of usage of the Grip-C. Hopefully, I’ll be able to use them enough before it happens.

    Final thoughts

    I am still very excited about these handlebars: finally adding a safer grip option, that clearly makes this product unique compared to my Bici hoods, was what I was looking for all along. It will allow me to adopt a very ”aero” position while having a firm and secure grip on the handlebars.

    Not ready to spend so much money on handlebars?

    More and more options are becoming available on the market. Seems like Bici will eventually come out with a new hood design, so keep an eye out for those. I’d say the strongest contender and most viable option as an alternative to the Velobike Skat Handlebar is the Vision Metron Track handlebar. The Thumb rest is very smooth, rounder and offers a similar grip surface.

    There are 2 main things to consider:

    – The vision Metron Track is only offered in one width: 36.5mm

    – It is very hard to find because it is rarely available.

    On a positive note, depending on your position toward high end gear and Track cycling gear: maybe you pay double the price for the Velobike stuff, but it’s readily available, worldwide. When you purchase something from Velobike, you get the feeling and the satisfaction that you are buying a product that was made for track cyclists and that the company cares about their customers.

  • Velobike Skat Endurance Handlebar Review

    Velobike Skat Endurance Handlebar Review

    The OG handlebar for Track Cycling Bunch events.

    By proposing a new type of modern handlebars for track cyclist, Velobike challenged the whole track cycling market by introducing new products to a market that is usually dominated by big or obscur companies, offering limited access to the best equipment at ridiculously high prices. So if there is one thing that Velobike have succesfuly achieved, it’s that they have set a standard for equipment usage amongst athletes worldwide. Equipment that they developed, designed and marketed very well to a point that world class athletes and amateurs adopted their products massively.

    In fact, they proposed solutions to problems that most track cycling were having. Coming up with a complete catalog of stuff that a close to inexistant critical mass of track cyclist, spread around the world, went on to adopt and perform at all levels with.

    Furthermore, Velobike have managed to create products that adapt to the needs of high performance track cycling, that can integrate to existing bike platforms and at a price that is still decent. In a very small market where almost every component is proprietary, this is something quite interesting.

    I went to the bike shop

    Among the nice things that you can find in Velobike’s catalog, is the Track bike adapter kit for your smart trainer. Something I have been wanting for years when I was more invested in track cycling.

    Although I really wish i could ride my track bike on my smart trainer these days, I decided to purchase a set of Skat Endurance Handlebars instead. And against almost everything I believe in, I went ahead and purchased the 300mm wide version. Because, yes, I think the super narrow handlebar trend, especially on the road, is dangerous.

    So I can say this, all that will be written here will be my honest opinion and review of this product, that has set a standard in the ”track cycling handlebars business”. If I was the type of person to use clickbait titles, I’d use words like ”disrupting”. and ”broken” to make a tiktok video of this review.

    Here is what we are talking about.

    Why?

    As I am getting less and less flexible, it became obvious that I would spend most of my time riding the track on the top of the bars. For a while, I have been using the Bici Hoods that are great, really great. My search for new ways of finding speed lead me to numerous articles about drag, aerodynamism and how to be as efficient as possible while traveling at high speeds on the velodrome.

    Since I failed to find ridiculously narrow alloy handlebars to mount my Bici hoods on, I started to consider the higher end products.

    the Bici hoods, from Trackloft
    The Bici Hoods
    The Bici hoods are a simple yet effective way to add hoods on your handlebar.

    I also wanted something that would be close to a ok time trial position, without having to invest in a whole TT setup. I was never a good Time-Trialist, mainly because of my lack of flexibility. I just can’t get into a good aero position and output my best power at the same time. Add to that the amount of time you need to ride in that aero position, fine tune it, fiddle with adapters and expensive parts and yeah, you lost me.

    So I came with what seems to be the best alternative. Work on my flexibility just for the sake of staying healthy, and find the lowest and narrowest position that is still comfortable and efficient.

    But why, again?, because every bit of time you are not spending to fight against air resistance on a track bike, is time that you can use to either go faster or further.

    The Skat Endurance Handlebar

    It’s a massive piece of T800, mixed with T700 carbon, with a glossy finish. Notice that there are inserts on top of the bars. Those inserts are interchangeable, offering different types of grips (of lack of). At the time of writing this, only the Grib B were available, but I am waiting for the Grip C, which seems to be the most popular grip used out there. The grips are made of Nylon, and manufactured by using a MFJ additive process.

    The Grip-C is the design that made this bar so popular, and finally, some other manufacturer are adopting it and integrating similar concepts into their track bar design. The thing is, track cycling is sooooo marginal, that everything costs a lot of money. A lot. but when you compare the 12 000$ handlebars that some other companies make, the Skat Endurance handlebar is almost inexpensive, (almost).

    Aside from the grips, the handlebars have a nice little flare in them, which is nice. It gives some room for the forearms when in the drops and ads a little bit of stability when out of the saddle.

    Finally, there is a little notch on the left side of the aero top for your thumb. this was specificaly designed to allow for a better grip when giving your relay during a Madison race. I don’t see myself using this but for real endurance riders out there, it’s a plus.

    The Skat Grip-B
    The specs

    There are 4 sizes available for the Skat handlebar. Ranging from a super narrow 275mm width to a casually narrow 350mm width measured centre to centre at the drops. With a 15deg flare, the width at the grips is narrower.

    Every grip can be replaced by another model to suit your needs. Those are feel pretty solid. I would not be afraid about breaking them.

    More info:

    – UCI legal for the 2023 ruleset (Yes I am afraid the rules will change and that I wont be able to use them next year)

    – Designed and tested to exceed 1.5x ISO strength requirements .

    – Ceramic gloss finish

    – Japanese Toray High Modulus Carbon Fiber (T700 and T800)

    – 275mm, 300mm, 325mm and 350mm widths (center to center) 110mm drop (center to center)

    – ø26mm grips

    – ø31.8mm stem clamping area

    – 15° grip angle

    First Impressions

    I rode with my new bars for 45 minutes on the rollers. I’d say the Grip-B is very similar to the type of support and comfort that the Bici Hoods provide. I can’t wait to get the Grip-C to try them out for additional support.

    The width is surprisingly comfortable. The flare is perfect. At first I thought I would have wanted more flare, but it turns out that 15deg is the sweet spot.

    The Madison grip is quite nice but I am not sure it suits all hands sizes. I have fairly square shaped medium hands, it’s perfect. Smaller hands will maybe have less support and larger hands will probably have issues fitting the thumb between the stem and the bar. As I can’t change hand size, I’ll have to get people to try it out.

    I think the only thing I would have wanted to be a bit different is the Bar end. It’s pointy, and I would have preferred a non-tapered, flat end. A bit like the Novacorona Ares Bars.

    What’s next?

    Testing.

    Who knows how many watts I could be saving with the Skat Endurance handlebar. So I’ll be testing different setups, and comparing values. It’s quite basic since I only have a powermeter to do that testing, but the velodrome is a fairly stable environment and it’s easy to test different equipment while respecting some basic parameters like speed and bike fit.

    This is one aspect of track cycling that is quite annoying for amateurs. No one shares their data. It’s such a competitive cycling discipline. I am sure that testing all that equipment is costing a lot of money and once a federation had found a fast formula, they have no incentive to share it with others. Which makes sense.

  • The Lezyne Pressure Overdrive Pump

    The Lezyne Pressure Overdrive Pump

    A pump designed for tubeless tires installation.
    Lezyne Pressure Overdrive floor pump.

    The struggle to install tubeless tires are home might be over. Especially if you have limited room and no space for a small air compressor. Introducing the Pressure Overdrive pump from Lezyne. A floor pump with an air canister attached to it that supposely can help you seat any tubeless tire. I have been testing this floor pump for the last 6 months and here are some thoughts.

    The Lezyne Pressure Overdrive floor pump is a big floor pump and thanks to its air canister and foot activated release valve; it’s ideal for seating tubeless tires at home and on the go.

    The secondary chamber (the canister) can be pumped up to store air under pressure. This air can then be used to seat a tubeless tire. If the tire was properly installed and centered over the rim, this sudden blast of air can easily seat the tire bead of any road, gravel and most mtb tires.

    I did a video review on my youtube channel about this Pump. I’ll link it a bit later in the article.

    Some cool specs

    The Pressure Overdrive boasts some cool features that are inline with Lezyne’s innovative nature.

    It’s got a huge gauge. It sits at the top of the pump so not only is it easy to read, but it’s also less prone to get damaged and collect dust.

    The (infamous) Lezyne air chuck also has an incorporated valve core remover. Quick tip: if you remove the valve core before trying to seat your tubeless tire, you will greatly improve your chances of succeeding.

    the Lezyne ABS-1 pro chuck
    the ABS-1 pro chuck can also be used as a valve core remover.

    Most of the small parts are available from Lezyne or their distributors, so you can replace the chuck, the hose, the gauge, etc. Even the wooden handle is available.

    It can inflate tires up to 200psi.

    How it works

    It works just like a regular pump, but keep in mind that you should always keep some air in the canister, even if you don’t plan on installing tubeless tires. If there is no air in the canister, the air contained in the tire will flow in the canister. That means more pumping.

    Once you operate the foot lever, the air in the canister will flow in the tube/tire/tubular (or the other way around if there is more pressure in the thing you are trying to inflate) until the pressure in both is equal. Only then it is possible to inflate to the desired value.

    Before disconnecting the hose, make sure you close the canister valve. Otherwise, you will lose all that hard gained pressured air. (It happened to me a lot, and it sucks.)

    Does it work as promised?

    Yes! Especially if you remove the valve core first. And there are more ifs:

    Make sure the tire is well installed

    Make sure the rim tape is in good condition

    Get as much air as you can in the canister. Don’t think 80psi will be enough, it won’t.

    Once you open the valve, the air will quickly rush out of the canister. Make sure you can help the tire seat, or ask a friend to help you if you have one of these super supple tires. (Like a Rene Herse extralight).

    Is it a good everyday floor pump ?

    Not really. First of all: It’s slow. Although the actuation is very smooth, and it’s easy to get high pressures out of it, the volume it displaces is quite low. If you are in a rush before a race or at the shop, I would not be using that pump.

    Then, keep in mind that a lot of people just can’t manage the Lezyne ABS chuck, so you will either have to help them inflate their tire or replace it when they break it. I’ve been dealing with that chuck since it launched and I can tell that it’s not a popular feature.

    Luckily, Lezyne also makes a more traditionnal chuck, the Dual Valve Pump Head, that can be installed on any of their pumps.

    The pros

    It works for what it was designed for. Sounds obvious right? Well not all air canisters work and not all of them have the built quality of the Lezyne.

    The huge quantity of spare parts available for this pump means that your investment will last and you will be able to maintain it over time.

    It can also inflate track tubulars. Yeah, at the opposite of the tire technology spectrum, you will find tubulars. A stitched closed tire casing with an inner tube stuck inside, sometimes made of latex.

    Thanks to a gauge that goes up to 200psi, and because the pump is actually easy to operate, even at high pressures, this pump can become your track day pump. Incidently, a Silca 90degre pipe fits the ABS chuck threads perfeftly.

    It’s built to last. The Pressure Overdrive, like most Lezyne products, is made of quality materials, more often then not machined alloy and steel. High grade plastics are used for smaller parts.

    The cons

    It’s bulky and not well suited for travel or weekend rides. So you’ll need a second pump to throw in your car or the keep next to the door when you just want to add a wee bit of air.

    The ABS chuck is a well designed product. I personnaly dont mind it, but I know it’s not made for everyone. It can lead people to get so angry at their pump… believe me. There is a lot of tightening and untightening involved in inflating a tube or tire with a Lezyne pump. Plus, I’ve seen countless amounts of valve cores behind removed by accident by unexperimented Lezyne pump users.

    Get the Dual Valve head and be happy. 🙂

    Let’s talk about the price

    At 149$us, 199$cad, the Pressure Overdrive pump is not cheap. Heck it’s the price of a small air compressor.

    But the built quality is up there. The many functionnalities and characteristics are worth the price. Plus it’s a non-disposable product: spare parts are available and easy to find. If you care about keeping your stuff for a long time and reduce your consomption of products that end in the bin, any product made by Lezyne is made for you.

    Is it for you?

    If you enjoy doing your own mechanical work, and you have to deal with multiple tubeless wheelsets, this could be for you.

    Especially if you have limited space. Perhaps, like many, you live in a small appartment or far from a bike shop.

    If you only have one bike, and don’t care about tubeless installation, this is probably not for you. There are better floor pumps for general usage. Also keep in mind that dealing with tubeless tires, sealant, rim tape installation and worned out valves can be frustrating and exhausting. Sometimes it’s just better to bring your stuff to your local bike shop and have them do the work, with better tooling and more ressources.

    Verdict

    As a ex professional mechanic, dealing with many tubeless wheelsets, the Pressure Overdrive pump is the best home mechanic pump I could hope for. It’s also, I must say, the minimum I would go for considering the high volume of bikes I have to maintain. Anything less than what the Lezyne Pressure Overdrive has to offer would simply not cut it.

    During the 6 months I used this pump, I also came to the realization that I am probably going to need a small good quality air compressor.

    Video review
    About the testing and review:

    I purchased the Pressure Overdrive pump with my own money. Although Lezyne sent me many products to review over time, they did not have access to this review before posting it. My review and opinions are solely based on my experience with the product.

  • Bont Vaypor G long term review

    Bont Vaypor G long term review

    I always thought that the shape of any shoe, may they be trendy, casual, dressed or for sports, never fitted my foot shape.

    Not that I have any sorts of congenital deformation or an abnormally shaped foot. I just always felt like if my toes were crammed at the front of a shoe, it would limit my ability to perform whatever I want to do and would eventually cause long term injury.

    Take any Italian designer shoe… change the materials, drill 3 holes under it and Voilà! You are a cycling shoe designer!

    Most cycling shoes look really good. They however don’t offer any sorts of comfort and most of the time you will end up with numb feet, cold feet and/or blisters and small injuries.

    Same goes for running shoes, golf shoes, climbing shoes etc. We like good looking things, fast and modern looking sports equipment. It’s a non-sense when it comes to shoes, in my opinion, that looks should prevail on function.

    A sports shoe is a tool used to enhance your performance, not limit it. Anyway…

    What are people buying?

    I worked almost 20 years in bike shops, and rarely did I ever sell a shoe that would perfectly fit anyones’ foot. (or feet, ’cause you know, most of us have 2). Most cycling shoes from the early days till mid 2000’s where narrow, uncomfortable but hell! good looking. People would come in whenever an Italian brand had a new model out and purchase them. The requirements were: as stiff as possible, as light as possible, good looking.

    It did not matter if they were not comfortable. Looks, prestige and the promise of higher performance trumped any other considerations beside price of course.

    I can list all the cycling shoes I had in my life. Very few were comfortable and all the ones that were had something in common: they had a sole shape and body shape that was more round than most pointy aesthetic shoes and they did not squeeze my big toe outward.

    Here are some of the shoes I had in my life. The * marks the ones that were well made.

    • Shimano MO51 (a classic)
    • Some Scott shoes
    • Carnac Greg Lemond Edition *
    • Shimano Entry level road cycling shoes
    • Nike Carbon Cycling shoes *
    • Shimano SH-R300
    • Shimano SH-R310*
    • Sidi Ergo 2 Paolo Bettini
    • Mavic whatever shoes (the worst shoe known to mankind)
    • Shimano Spyre RC9
    • Specialized S-works 7 * (I have 3 pairs)
    • Specialized Torch S-works
    An old Carnac flyer. Damn those shoes were ahead of their time!
    Sidi Ergo 2 lux steel Paolo Bettini special edition shoes

    The idea is to let you know that I owned a lot of shoes, and tried even more as I did loads of product testing when I was working for my local bike magazine.

    From that list, I still own the Nikes (that I keep because I feel bad throwing them away) and my Specialized shoes.

    My opinion all those years was and still is: why do we, humans, make shoes that absolutely do not fit our feet? Has anyone looked at their feet before sliding them in any new balance runners or Sidi shoes? (I do not have anything against these brands specifically, they are successful brands and make good products). And I wonder why, even if they do realize their toes will be crushed, they still purchase them.

    What’s wrong with most cycling shoes?

    I am not a physio, doctor or health professional. So, I will not pretend to know more than what I can feel and experience. But you will find many articles about proper footwear fit and why it’s so important, if you look around a bit.

    But please try this: squeeze your finger together and pretend you are making spoons with your hands, like if you were using them to drink water. Now, keep your hands in that form and try to do 10 push ups. Well, try just 1! See? something is not right. If you are looking to perform in any kind of sport I think you should be able to stand and push on your feet without them being crushed laterally.

    Essentially, most cycling and sports shoes are too narrow. The pointy tip of the shoe makes it aesthetic but compresses your toes and could, over years, be the cause of bunions (Hallux Valgus).


    Bont Cycling

    The first time I saw those, they were Exotic AF (and still are for most of us)

    Bont is established well enough now. But the first time I saw a pair back in the mid 2000′ I was stunned how different the shape was. It stood out completely from anything else that was available on the market in that era and, sometimes, still does to this day. The Vaypor G is a clear example of that.

    So what is so different about these Bont shoes?

    They make anatomically designed shoes. Simple as that.

    This explains the unique shape of Bont shoes. It’s made to let your feet naturally sit on the sole while also being supported.

    There are many shape/fit available from Bont Cycling plus the fully custom option.

    • Standard
    • Wide (some models have 2x wide)
    • Asian
    • Full custom
    The Vaypor G has a distinct shape. 
Some gravel action going on here!
    From this perspective, the Bont Vaypor g looks like any other cycling shoe.

    The review

    When Bont offered me to try their shoes, and review them, I was stoked! So I might say I was a bit biased before even seeing the product.

    That being said: I was not sure about the Vaypor G at all when I first tried them on.

    First impressions:

    I don’t think there is another shoe out there that has a foot bed like the Vaypor G.
    So It is quite surprising when you first try the shoe on. The shoe feels very raw. You can perceive every bits of it, the sole, the upper, the carbon foot bed, everything.

    Another top view of the Bont Vaypor G
    Boa Dials are easy to reach and use. Plus, they are replaceable!
    The ultra stiff carbon sole is protected by replaceable guards that also provide grip when things get rocky muddy.
    First ride:

    I am not the type of guy who has fun spending too much time on adapting and fitting my equipment. So I took the shoes out of the box, slammed some cleats on them and went for a ride.

    On my first ride, I thought that maybe I should have heat molded them. The carbon foot bed is very stiff. In fact the whole shoe is very stiff.

    It’s not made for walking (if you are that type) and definitely is a high performance Gravel oriented shoe.
    I guess you could use them for Cyclocross as well, but running uphill on roots and rocks might not be the best experience ever with these shoes. I’d say that most elite racers do not even get off their bikes anymore.
    It’s less of a concern if you can bunny hop and ride up and down most obstacles thrown at you.

    Anyway, after my first 70km, my feet where hurting and I had a couple of blisters which made me think that I should have prepared better.

    Many many rides later

    I can easily blame my first ride experience on myself. I could and should have tested the shoes on shorter distances and, I barely rode my bike before going out for 70km of gravel. Which was dumb.

    The discomfort went away on the second ride. Like most new shoes, it takes a little while getting used to them. Again, I was dumb to just go out on a long ride and think I would be fine. After loads of shorter rides, a few cyclocross races and another Gravel event, I can say that I can’t really go back to my previous shoes. I prefer the fit of the Bonts.

    I did not attempt to mold the shoes as I never saw the potential benefit but I will, just for the sake of testing it.

    What I would recommend is to explore the different insoles that Bont offers. You can get low arch, mid and high. There is so much room for your foot so why not improving even more your fit and comfort.

    Designed and manufactured in Australia and specifically shaped to match the unique design of the the Vaypor shoes series.

    Built with a contoured carbon fiber core, for the ultimate in efficiency and support, Vaypor Series innersoles are wrapped in a dual-density EVA foam cover for a comfortable ride with fantastic durability.

    Offered in three widths (standard, wide/Asian and double wide), three arch support heights; low, medium and high, the Vaypor Series innersoles by Cobra9 deliver more evenly distributed peak forefoot pressure for greater support and reduction of hot spots and discomfort.

    Final thoughts.

    The Bont Vaypor G cycling shoes offer a distinct type of fit, some adaptability with heat molding and a stiff carbon sole capable that should assist and allow you to perform at your best level. The boa retention system works flawlessly and each dial can be replaced, with different colours also offered.

    Venting and heat management is quite good. I do prefer warm weather, so I did not experience any episodes of overheating.

    Power transfer is well transferred to the entire carbon sole. Even under heavy load, you can’t feel the cleat pushing against the sole like on so many other shoes out there. That is a huge plus.

    If you’ve always compromise on shoe fit and comfort and lost faith in finding the right shoe for you, I would recommend that you visit their website and go through the FAQ and different models they offer. It’s totally worth it.

    Pros:

    • Stiff
    • Anatomical fit
    • Boa retention dial placement is optimal
    • Replaceable dials, studs, heel pads and sole guards
    • Wide range of fit and size
    • Custom option available
    • Heat moldable
    • Competitive price for this level of quality, fit options and features
    • Awesome support from the company and the FAQ has loads of useful articles.

    Cons:

    • Rarely available in store for sizing and fit check
    • Not the best looking shoes out there
    • Requires a lot of research before ordering the right pair. If you are an impulsive buyer, make sure you take your time and read all the pertinent FAQ articles.
    • Longer delivery time (again, it’s a serious purchase, and one that will last a long time)(not a issue for me, but in a world where everything gets delivered next day, it’s something to keep in mind)
    Boa dials are available in many colors
    Bont Vaypor G sole guard kit.
  • Camelbak Circuit Run Vest Review

    Camelbak Circuit Run Vest Review

    The rebirth of Hydration packs.

    Here I am about to write about a product that used to make sense to have and that suddenly almost disappeared from the cycling world, only to come back stronger than ever thanks in part to adventure and gravel cycling.

    Still, Hydration packs are not new to cycling. Perhaps even some of you kept using one after the hype of the mid 2000’s.

    With the growth of gravel cycling and adventure cycling, and perhaps the introduction of long distances races, where some racers felt like stoping to get some water and food was out of question to save those precious seconds or minutes, the hydration pack is back! (yeah go on; make the joke…)

    I believe the OG hydration pack users where looking for maximum storage capacity and maximum hydration volume because back then, having stuff like packs and bags on your bike was lame.

    Fast forward to present times, where there are all sorts of different and cool frame, handlebar, stem and everything else bags. The necessity of carrying stuff (re)created demand for cool, light and performance oriented hydration packs.

    Why would you get one (or why did I want/get one)

    I am not the guy who does the most gravel events out there. And I am far from being one of the fast ones. So I often get to feed zones and either there is nothing left, or the waiting time is so long that when I get back on my bike, my legs are cooked. It sucks.

    My bike can handle 3 water bottle cages, 1 of which I keep for a tool box/bottle. It took me ages to come to the conclusion I needed an hydration pack if I wanted to not stop at feed zones or only stop if they had something fun to eat or drink.

    So if, like me, you want more hydration capacity while keeping the bike weight down a bit, then maybe an hydration pack is something you should consider.

    What I got and why

    So, I started looking at Camelbak’s website. I knew the brand (who does not), I once had an hydration pack from them (I had a love/hate thing with it) and considering the trendier brands out there, I knew they had some offering within a reasonable budget. In other words, I could get one, try it, love it or hate it, for cheap.

    I started browsing the cycling section of the website. I came accros the Chase Bike Vest, Hydrobak lite, Rogue lite and Classic lite. All of them reminded me of the old pack I had, with a bunch of pockets on the back to put your stuff. I understand if you need and want that, but it was exactly those features that I wanted to get away from.

    So I started looking at the running category. I though: ”runners need gels, bars, maybe a whistle, a small knife in case they get lost and want to build a cabin”. In fact, I don’t know what runners need but all that made sense to me.

    The very first product to pop was the Circuit Run Vest with a 1.5L capacity. No pockets on the back portion (except for the one containing the reservoir). My search was on to a good start.

    Circuit Run Vest
    Circuit Run Vest Mesh and front pockets

    Also, the front pockets looked easily accessible and there is even an additional pocket with a zipper so I knew that was plenty of storage for my needs. More on the pockets later.

    Here are the specifications:

    • BPA/BPS/BPF Free
    • Material : Recycled N70D Ripstop with C0 DWR
    • Size: 35 x 21 x 11 cm / 13.8 x 18.3 x 4.3 in
    • Pack Weight: 360 g / 12.7 oz.
    • Hydration Type: Crux® 1.5L Reservoir
    • Gear Capacity: 5.5 L
    • Hydration Capacity: 1.5 L

    I’ll say this, the fact that Camelbak mixes metric and non-metric units to specify the capacity of their products probably weighted in my decision to pick the Circuit Run Vest. I knew I was purchasing the equivalent of 3 water bottles (I usually run 550/620ml bottles). And I can not be bothered with onces.

    So now, I can start any gravel ride with the equivalent of 5 water bottles, which for me is about 5 hours of riding. It gives me the flexibility to empty both my water bottles and kind of pick when I fill them back up, potentially avoiding long queues at water stations.

    Sounds like a win.

    The fit and the feel of the Circuit Run Vest

    Both shoulder straps are adjustable in length of course. I am not sure yet where the pack feels best when riding, but the straps are plenty long and I plan on cutting them once I find the right fit.

    The chest straps are not the most meaty. In fact, they are pretty thin and I guess someone who runs would prefer the lightness of those straps over sturdy and more cushioned ones. I found that a bit annoying at first but quickly forgot about those when I was riding. In fact, I don’t use both so maybe I’ll cut the one I am not using as well.

    The Mesh of the shoulder straps and backing of the pack is good enough that you forget about it. I tried it on a hot summer day and I did not feel like I was carrying a toaster on my back. Seems like the cooling effect of the mesh works. Another win.

    Speaking of the Mesh, it’s not the most comfortable material to feel against your skin, and if you wear a light jersey, you might feel it a bit. Once you start riding, I believe you’ll forget about it quite fast, unless there is a real comfort issue or chafing. But I felt like it was comfortable enough, especially for an entry level, minimal hydration pack.

    Maybe one day I’ll try some of the fancy stuff, but for now the Camelbak Circuit Run Vest is perfectly fine for me.

    Storage

    Aside from the 1.5L reservoir, I did not really test the packs’ storage. I bought it because it has pockets on the shoulder straps and this is what I tested.

    The left shoulder strap has an extra zipped pocket in which Camelbak suggest you put your phone. I mean, yeah, sure. It’s a secured pocket, put anything you want in there. My phone with the case did not fit well enough and it would have been challenging to take it out while riding. I like to film stuff while I ride, sometimes I even get good enough videos for a cute reel or an instagram story.

    Both shoulder straps have a pocket to put your food, gels, tabs etc. and are probably deep enough to store a Banana. I’d say it’s the feature that annoyed me the most.

    The pockets are too deep. It’s quite challenging to reach anything that gets at the bottom, like half a clif bar, or the lonely leftover energy chew that you really need on that last 30 minute push to the finish line.

    So here I am thinking about how to adapt or modify those pockets. Maybe I just need to adapt how I store my food. Remember those reusable gels bottles that you could fill up with Energy gel sold in 1L containers? I have not seen gel sold in bulk for quite a while now, but that sounds like something I could do.

    One pocket for the gel bottle, one pocket for the bars and snacks.

    Overall, I believe there is plenty storage available and that if you need more, the Bike oriented packs might be the way to go.

    What about the hydration function?

    Well, if you fill the reservoir with water, you can drink that water. Fancy!

    In fact, I believe this is where Camelbak has made nice improvements over the years.

    • The Hydration hose is easily accessible and can be installed on either shoulder straps.
    • The valve that allows flow is easy to activate. No more fiddling with a tiny lever on a gummy spout. It is sturdy and gives a clear feedback on whether the thing is in one position or the other. There is a visual indication as well, but hopefully you wont have to look at that while riding.
    • The Crux Reservoir is easy to open and fill up. It is equally easy to open for cleaning. That is a major win over the older reservoirs.
    • You can easily remove the hose from the reservoir for cleaning.

    Bells and whistles

    Like a lot of adventure packs and backpacks, the Circuit Run Vest has loads of small straps and loops that allow you to hang or clip stuff. I have no idea what, but I am sure there are creative and functional ways to use those bits.

    And there is also a whistle! Surprisingly loud enough to annoy someone beside you, not sure if it would be helpful in an emergency situation, but it’s there. I’d rather have it than not.

    Final words

    I wanted a light hydration pack, capable of carrying a small amount of food and gels, maybe car keys and add enough hydration capacity to my setup so I can be autonomous and not rely on feed stations.

    I found exactly that with the Circuit Run Vest.

    Pros:

    • inexpensive
    • adequate
    • no nonsense features
    • easy to clean reservoir
    • available spare parts

    Cons:

    • lacks something of a premium feel
    • Shoulder straps might not fit taller/larger people
    • not easy to remove or equip while riding
    • the hose is very rigid
    • Colors are boring!

    if you are looking to get your first hydration pack for gravel events, and maybe have one for running as well, this might be it! It’s lightweight and has enough features to get you through most bike rides if you have other storage solutions already equipped on your bike.


    * I purchased the Circuit Run Vest with my money, from my local bike shop and my opinion is based on my riding experience alone.

  • The smoothest ride since tubulars – Vittoria Corsa Pro

    The smoothest ride since tubulars – Vittoria Corsa Pro

    The new Vittoria Corsa Pro might be the best tire out there.

    I was actively looking for new tires that would allow me to ride till the end of the 2023 road season. I recently had small issues with my Pirelli tires, who are affected by a recall.

    As it often happens at the end of the summer, shops and distributors have very little in stock. And I was not going to settle for some third tier tire as I knew these would probably stay on my bike until late next season.

    So of course, I went out looking for a pair of Continental GP 5000 TR, in 700×28. And no luck: it’s out of stock. Everywhere!

    I was maybe going to consider a pair of 700×30 but then I saw a nice box with the Vittoria logo on it. A quick web research about the new Corsa pro confirms what most of the experts predicted when that tire made its first appearance on Jumbo-Visma Bikes. They are supposed to be fast, comfortable and reliable.

    The last set of GP 5000 (clinchers) I had were… boring. Efficient? Sure. Comfortable? not really. Did they feel fast? Not so much either. I know they are great tires. But I was looking for tires for my casual ride bike. The bike I take out when I ride with friends, on fast group rides or the casual ones. I wanted tires that would make my bike feel great! Not just be the most efficient and fast.

    Of course, I had Vittoria tires in the past. And honestly, I was never impressed. The so called ride quality of the open tubular tire never really convinced me. The first generation of open corsa, way back mid 2000’s, was fun to ride for maybe 200km until you started getting punctures after punctures. Then, I probably tried each iteration of those tires, either through sponsorship or by curiosity. And my opinion never really changed.

    So I was holding the box in my hand, thinking of my history with those tires and I was not sure I was ready to take a 200$ gamble. But reading about the new tire construction, and after getting some feedback from friends, I decided to show up at my local bike shop’s cash register and spend my money.

    Before Talking about the ride quality, I have to mention a few things.

    The packaging.

    Some of you may know, I criticize packaging a lot. For many reasons, but I generally judge packaging on those elements:

    • Is it somewhat ecological / eco friendly?
    • Is it easy to merchandise/market in store?
    • Does the packaging display all the important features of the product?

    Vittoria FINALLY moved away from those terrible Hexagonal shaped boxes, that kept opening from the bottom, quickly becoming a nightmare for bike shops to market on their sales floor. Those boxes were a small step in the right direction; ditching the previous plastic sleeves used to wrap the tires.

    Anyway: the new box is great! And here is why:

    • It’s made of recycled materials and is recyclable again. (depending on the facilities in your area, the packaging is even compostable.)
    • Displays all the pertinent info about the tire and even more!
    • It’s got a nice little handle so shops can easily hang it on their walls.

    I was so excited to get the tires out of the box that I forgot to take a picture of the Unopened box.

    Technical information

    One thing that tire manufacturer are trying to do is to come up with some sort of Tubeless standard, even more so since a lot of wheel manufacturers have implemented (for better or worse) the hookless rim technology into their lineup of products.

    Well, Vittoria did their homework and are displaying a lot of technical info on the box and the tire itself. You can now easily determine how safe it is to ride this tire depending on the rim you own and potentially avoid all the possible nightmares caused by the road tubeless technology.

    In my case, I knew that the ETRTO specification of 700×30 on 21mm width rims was perfect for my Hollogram wheels. Plus, Vittoria clearly indicates the maximum tire pressure recommended depending on your wheel setup, which makes it easier for anyone to inflate their tires safely.

    You don’t have to read the fine prints: All the info is clearly displayed.
    Technology made its way on tires… imagine that!
    Tire Technology

    Of course these tires benefit from all the latest technology Vittoria has to offer.

    If you are into buzz words, you can look up all their spiel on Graphene (from which comes their obsession with the hexagonal shape) and Silica compound.

    The ride

    Alright! here we are.

    Until I get punctures after punctures, and cuts in the sidewall of this tire (if ever); I will say this:

    This is the most satisfying road bike tire you can ride, right now, on the market.

    Here’s why:

    • It feels absolutely fast (even the bulkier 700×30)
    • It is very comfortable and supple. ( keep in mind I am riding tubes for now)
    • I suspect this tire would be even more fun, supple and comfortable in a tubeless setup.
    • It has a similar grip feel than the GP 5000.
    • It feels light, fast, comfortable. (Yes! I am repeating myself)

    A few things to consider before purchasing:

    • There is only 1 sidewall color. It does not fit well with my bike. But it is what it is.
    • The price. This is definitely a high end tire with a premium feel.
    • Some might say it is hard to install. I personnaly thought it was in the ”easy to medium” range of how hard a tire can be to install.
    • Be sure to never use Amonia based Sealant if you are planning on riding Tubeless.

    Verdict:

    Possibly the best road bike tire on the market right now.

    I rode this tire for… 200km. Yup, that’s it. And it was enough to convince me.

    And I can tell you this: on a nice sunny, warm day, this is the best road bike tire I ever rode. It feels spectacular. It’s not dull, neutral, boring. It has some flair and it makes you feel great on the bike.

    What I also mean is that I have not yet had the chance to test the tires in wet conditions and I doubt I would even report on that in the future as riding in the rain is generally a ”mid” experience and tire performance is definitely not the first thing I have in mind. (unless I get a puncture of course)

    If you are looking for amazing, high end, high performance tires for next season, go to your local bike shop now and pre-order them. Keep in mind to verify with your wheels/rim manufacturer if the tires are compatible with them especially if you have hookless rims.

    * I purchased thee tires with my money, from my local bike shop and my opinion is based on my riding experience alone.

  • Tubeless madness

    Tubeless madness

    Should you ride Tubeless tires on your bike?

    Tubeless tire technology was rapidly adopted by mountain bikers in the mid 2000’s. Oddly enough, Road tubeless tires have been around since the mid 2000’s as well but still have not been adopted by most riders. For a technology that has been around for so long, it is quite surprising to see that there is still no real consensus on what should be the ”norm” for road tubeless tires.

    They first ever tubeless wheels I rode were the Shimano Dura Ace (WH-7850-C24-TL) wheels with Hutchinson Fusion tires. Back then, there was no sealant used and it was said that the most popular sealant then, made from Stan’s, was corroding the rims. I went on riding 2000km with that wheelset and tires with no issues, not even a puncture and on top of that, the whole setup was easy, effortless and safe.

    So why is it that in 2023, we have about as many tubeless rim standards as there are seatpost sizes and so little confidence in the technology? How can tire companies make some of the most efficient tires in terms of rolling resistance but not endorse a wheel design or brand while some others just develop their own tires to match their rims.

    Unfortunately I do not have answers to any of these questions. All I have is experience riding many, many different setups, tires and rims brands.

    Tubeless is (finally) getting some traction.

    One thing is for sure, riding tubeless tires is a consideration a lot more people have, especially since there was a road cycling boom a few years ago. Now everyone can find (good or bad) advice on social media, internet, youtube and blogs, about any cycling technology. Needless to say all those multiple sources can create a turmoil of clashing and contradicting informations.

    I think this is another reason why companies, wether they manufacture rims, tires, valves or inserts, should sit down and come up with some sort of standard. I liked the Mavic Tubeless standard, called UST. It was simple, reliable and safe. But modern bikes, with modern wheels, getting wider and wider caused the death of UST road. Enve is working to create a standard, but will other brands jump in that boat? who knows…

    So, should you ride hookless rims vs hooked rims, tubeless vs tubes, what sealant type, inserts or not?

    It depends. Of course.

    If you don’t want to bother with sealant and keep the possibility of swapping tires easily without spending too much; i’d say keep riding tubes.

    If you only have one set of wheel/tires, and the rims are Tubeless ready, and the valves were included with the wheels and the rims have hooks: I’d say try tubeless tires. No more pinch flats, easy to set-up, more comfort, a bit more grip if needed and a relatively simple tire set-up for you or your local bike shop.

    If you are an experienced cyclist, looking for the latest innovation on the market, you feel comfortable with messing around bike maintenance or have a great local bike shop, you are the perfect candidate for riding hookless tubeless tires.

    the Zipp 404 Firecrest wheel has a hookless rim.

    Hookless rims are often a bit harder to setup, they, most of the time, require specific tires to match the rim and they are a nightmare to deal with when you have a puncture and the sealant does not do its job. Some hookless rims can’t even be used with a tube, so you are stuck riding tubeless.

    Now if you heard horror stories from your friends or online, about tubeless tires exploding while trying to set them up, most of the time, those stories involve hookless rims, tires that have not been ”approved” to work with a certain rim, or the person had little experience installing a tubeless tire.

    How to avoid Tubeless failures

    Here is a short list of advice:

    • Follow instructions
    • Don’t try to do a tubeless conversion the day before your ride
    • Don’t race new stuff
    • Pick a reliable, known setup over exotic stuff
    • whatever you do, safety first.

    Think about the people riding around you and their safety. Not just yours. No one wants to crash and get injured because you cut corners while working on your bike.

    The Muc-Off Tubeless Setup kit has everything you need for your first tubeless conversion kit.

    Tubeless made easy

    So if you are looking for specific advice on what products to use, I’ve got you covered. I have installed about every types of tires you can think of. Some good, some bad and some that were impossible to setup Tubeless. When I am stuck with a rim or a tire that does not want to seat properly, that shows signs of exploding off the rim while inflating or that leaks air and sealant and can’t be fixed, I always revert to this: Grab any Pirelli Tubeless compatible tire and it will work.

    For real. You might go through the usual tubeless struggle, but I have never failed to install a Pirelli tire on any rim regardless of the brand, type, width, shape or material. They might not show as the fastest tires when comparing with other brands, but they will work. And this is where reliability stomps speed. A reliable setup will always be somehow fast, at least much faster than spending 40 minutes on the side of the road with your hands painted with pink, orange or smelly sealant, a tire around your neck and a bunch of dudes that are only thinking of leaving you there and get back home.

    I am not saying other brands are not good. I am saying if you want a good first experience installing tubeless tires, pick a Pirelli tire, for you road or gravel bike.

    Pirelli cycling tires are the easiest tires to install when going tubeless.

    My tubeless setups

    I do have a wheelset that has Continental gravel tires installed. They are good tires. But they sure are not easy to install. I also have a set with Rene Herse tires, which are fantastic to ride, but a nightmare to install and I got 3 wheelsets with Pirelli tires. Again, installing those was easy. You can see the installation videos on my instagram and youtube page.

    Instragram @andreas_ihm

  • Le Braquet

    Le Braquet

    Life should be celebrated by riding a bike.

    For some people, riding a bike is their way of escaping something, to feel free, to celebrate a moment in life where nothing else but you, the wind and your machine matters.

    I like to think that there is a lot of beauty in the way you can express yourself on a bike. Your pedal stroke, the way you lean in a corner or goof around popping wheelies when you get to the coffee stop.

    Cycling is a simple sport. Although a huge part of cycling is about gear, wether it’s the bike, the components, whatever electronic device you need to ride and of course clothing; I still think it can be a simple sport. Sometimes it’s not. Because we live in an era where everything has to be modern, connected, aero, fast, and as soon as you get the latest thing, it’s already outdated by a new emerging trend.

    Maybe it is time for all of us to slow down, take a deep breath and enjoy the simple things of life.

    Simplicity with a little touch of ”je ne sais quoi”

    Le Braquet is a Montreal based cycling apparel brand. Their philosophy is inline with that: simplicity and admiring the beauty of nature and of all the beautiful things humans can make and create. Well at least it is the way I perceive their approach to what they do.

    Their offer is simple: they design good quality apparel, here in Montreal*, with love. Their collection includes a mix of colourful monochromes and more sober elements. Plus, they will have, from time to time, unique and limited editions to offer, often created in collaborations with local artists.

    And this is where Le Braquet stands out from the big brands of high end cycling apparel. Not only can you feel their implication in the work they do, but you can also see it, in a tangible way: Le Braquet is involved in our cycling community by providing club rides and by supporting many causes, charities and projects.

    If you ever meet the Le Braquet people out on the road, you will feel that genuine intention behind what they do.

    The Monochrome life of colours

    From a deep black bib short to warm tangerine coloured jerseys, earthy tones to pastel blues, daring forest green bibs and soothing pinks, Le Braquet’s collection seems to have been made so that all the pieces can be mixed and matched. Think of it as a painter’s palette, where colours mean nothing until the moment they are applied to the canvas. Something like that…

    Of course colours, styles, and whatever characterizes a piece of clothing becomes a way to express your personality. Maybe there is something in their collection that fits with yours. Beside colours, you will also find different fits and quality levels ranging from high quality clothing to what I would call luxurious.

    I have always been compelled by a strong non tangible aspect of Le Braquet, kind of like a personality trait, which I would say is best described by the french word ”tendresse” (tenderness). And again this is my perception of that brand, which could not be yours of course.

    If you are looking for an inspiring apparel brand to shop from and fill your wardrobe, take a look at their website. You might find something for you!

    #levelocestlavie

    Look out for reviews of their products in the review section.

    Spoiler alert: their Podium bib short is the best, most comfortable, bib I ever owned.

    *Le Braquet designs all their products here in Montreal Canada. The manufacturing is outsourced in foreign countries.

    all pictures are from @payette
    Le Braquet has authorized me to use them for this blog

  • When track racing serves you a lemon

    When track racing serves you a lemon

    Is the Brooklyn Machine Works Gangsta V4 a worthy track bike?

    Not long before my Cinelli Vigorelli Shark was officially banned from the velodrome, I had registered to a 2 day race at the Mattamy National Cycling Centre in Ontario (Canada).

    So I had to quickly turn around and find something to race with. I was expecting Cinelli to send me the newest Vigorelli, which is UCI legal to replace the Vigorelli Shark. But things being what they are since the Covid-19 pandemic, that sponsorship never materialized and so I was stranded on the cote d’azur (so to speak) with no perspective of riding anything but my rollers.

    Then I stumbled upon my Tracklocross bike and took a serious look at it. What if?

    This odd thing has enough clearance for 700×40 tires and yet is built around a track geometry with a steep head angle, high bb drop and short seatstays.

    The Gangsta V4 when I got it out of the box.

    Who the hell are Brooklyn Machine Works

    I purchased my Brooklyn Machine Works Gangsta V4 from a bmx shop in New-York. That frame is uber rare and I was glad I could find one. (although I admit I was looking for a Mash Tracklocross frame set).
    One could say I have a thing for single speed bikes and one would be right! Now, if you don’t know about Brooklyn Machine Works, no one could blame you. They are not really into the road bike, gravel bike and track bike scene.

    It’s a small company that used to make downhill bikes and pretty special ones too! Their design and engineering was unique and their bikes were considered as ”exotic” although they were US based. They became a cult brand and I am pretty sure people are still wondering when, if ever, they will start producing frames again. Here is a short article about them and how still today people look upon them: Brooklyn Machine Works .

    The build

    Although most people ride their Gangsta V4 with a fixed gear and no brakes, I opted for the safer (at least for me) freewheel and v-brake build, all that kitted out with a wide downhill handlebar.

    Originally, I never intended to use this bike as a true Tracklocross bike as I am not skilled enough to handle a fixed gear in any other environment than a velodrome. But now facing the fact I had no track bike for the upcoming event; I decided to remove the ”locross” from the Tracklocross and convert the bike to a simple steel frame track bike.

    Watch the build video here!

    Andreas riding the Brooklyn Machine Works Gangsta V4 Tracklocross bike.

    So I went on and removed the v-brake bosses and installed all the parts from my Cinelli on the BMW Gangsta V4.
    (If you wonder if there was a V1 and then V2 and eventually a V3 of the Gansta the answer is: Yes).

    Specs:

    Frame and Fork: Brooklyn Machine Works Gangsta V4 (Medium)
    Wheels: FFWD Red Hook edition Clincher
    Tires: Continental GP5000 (700×25)
    Crankset: Miche Primato (165mm)
    Chainring: Miche Primato (52T)
    Cog: Shimano dura-ace (14T)
    Stem: Thomson X4 0deg (120mm)
    Handlebars: Deda Velocity (40cm)
    Saddle: Specialized toupé Expert (143mm)
    Seatpost: Raceface Ride 27.2mm

    The Gangsta V4 fork. Bladed tubes and removable brake bosses.

    Riding the track

    The ride feel was better than I expected. The geometry, even with 700×25 tires which I guess the bike was not designed for, handled great on the track. It was predictable and stable with no speed wobble at ”higher” speeds.

    The main downside was the weight. Geeezus it’s heavy. Even with carbon wheels. Added to that was the total unresponsiveness of the bike. Even with top tier quality parts like Miche Primato cranks, a Izumi chain, carbon wheels and a dura-ace cog; power transfer felt like I was driving the rear wheel with a rubber band instead of a high quality 1/8 track chain.

    Am I blaming the bike for my somewhat bad performance at that event? Absolutely not. When you can’t perform to your full potential because of inadequate equipment, you can still try to perform good enough by adapting your tactics and racing smart. Which I tried to do to the best of my abilities.

    Andreas riding the Milton velodrome on the Gangsta V4 frame set assembled for track racing.

    So if you are wondering if you Gangsta V4 is Track worthy, (you would be one of the very few to own such a frame) well I’ll say this: Yes it’s good for track. But it is not good enough for high level racing for many reasons:

    • The frame and fork are heavy
    • I doubt the fork is UCI legal
    • It sure is not aerodynamic
    • It is not the stiffest frame for track racing (although stiff enough for Tracklocross)

    Never again

    Although the whole ”riding a funky bike at a national event” experience was worth it, I retired definitively the Gangsta V4 as a track bike and went on to find something else (more on that later).
    The track scene is rapidly growing in Canada and it is a good thing for our sport. It also means that people are investing more time, effort and money into track racing which creates some levels of inequities when it comes to the stuff people race with.

    I was fortunate enough to find a unlikely replacement bike within my own collection of bikes but also realized that things got serious at the velodrome. Now the gear you use has an immediate impact on performance, provided that you have enough race sense to be able to race track events (which comes with training and experience).

    I am not saying that everyone should go out there and buy an expensive carbon frame. But my advice would be to find a good quality alloy frame, like the new Cinelli (if you can find one) and kit it out with good parts. Finding good tubular wheels is a must. Don’t spend too much on things like the handlebars and other periphery components.
    The real deal is in the wheels and the drivetrain. Once you got that figured out you’ll see what’s your next best move. Purchasing good rollers could also be a nice thing. I digress…

    If you are curious about Tracklocross, I’ll have a few articles about that really cool discipline.

    Steel’s for real, but sometimes it’s just just real enough to make a good post race recovery lemonade.

    Side by side: The Track build and the Tracklocross build

    Here is my youtube video about my weekend at the track riding the Gangsta V4 as a track bike.
  • Project Cinelli

    Project Cinelli

    Finding motivation through a new challenge

    Looking to spice up your local crit racing scene? I did, and here is how it went.

    We have a local crit series for Masters in the Montreal area. And I have been attending those races for a while now, probably since 2008, on and off. So after a while, a few podiums and the repetitiveness of doing the same race series over the years I was kinda looking for a new challenge. The question was: How can I keep the my stoke level high, while I was kinda getting bored from doing those same races over and over again?

    And I had this idea, in the back of my head, for a long time now. I eventually sat down with Josh at Ibike and we talked about racing. The whole crew (my race team) is (was) kinda new to the racing scene and I am for sure at the opposite of that. So I did not want to kill the vibe; While everyone on the team was looking forward to the next event, I was looking away for something else.

    I told Josh: What if I raced a single speed crit bike? Not a fixed gear crit bike but a freewheel single speed bike, with 2 brakes!

    And the project started like that. Of course, the bike could also be used on the track (although I knew it would not pass the UCI inspection. More on that later or in another post).

    Josh came back to me a few days later and I was stunned to be handed a brand my new Cinelli Vigorelli Shark Frame set (like fully sponsored!). I quickly went back home and started gathering parts for my project.
    The main concern was to find an appropriate gear to sustain the race speed, accelerations and hopefully take part in the final sprint.

    The Cinelli Vigorelli Shark build for criterium racing.

    The build

    Road Version:

    Cinelli Vigorelli Shark (M)
    Mavic A319 32h rims
    Formula Track hubs (sealed bearings)
    Ridea Crankset (I replaced it with a Shimano since the build video)
    Izumi chain (straight from Japan!)
    Specialized Toupé Expert saddle
    Zipp Service Course Stem (130mm)
    Zipp Service Course HB (42cm)
    Cheap Tektro brake levers
    FSA K-Force Brakes
    Gear Ratio: 56/16

    Track Version:

    Cinelli Vigorelli Shark (M)
    FFWD Redhook Edition Clincher wheels
    Ridea Crankset (I replaced it with a Shimano since the build video)
    Izumi chain (straight from Japan!)
    Specialized Toupé Expert saddle
    Thomson X4 stem 0deg (120mm)
    Deda Velocity steel track bar (40cm)
    Continental GP5000 700×25 tires
    Gear ratio: 51/14, 52/14, 56/15

    See the build video here!

    The purpose

    So I build this bike to race criteriums. There was no doubt in my mind it was a cool idea. I was so motivated by this project that I did not care about the ”pure” fixie haters who were commenting about me running brakes and I did not care about all the 15k$ bikes I would have to go against. In fact, it was even a motivation for me.

    The bike is somewhat ”UCI legal” in the sense that it has 2 brakes, a freewheel mechanism, spoked wheels, a road handlebar… basically, all the stuff one would find on a regular road bike minus 10 sprockets or so. On the other hand, I knew the frame was not UCI legal because of the ”fin” featured under the BB, hence the Shark name.

    But honestly, when you show up at a local criterium race, I don’t think anyone would be bothered to complain about that feature considering it does not give any advantage to the rider and causes no danger to the other competitors.

    My goal was to perform with that bike to a similar level that I would with my regular road bike. And that is all I had in mind.

    First race

    Our local crit series is close to where I work, and live. So my first time riding the bike was on my way to the event. Riding at a warm-up/commuting pace with a single speed bike is not something strange to me. But doing it with such a huge ratio is. It didn’t take long before I started thinking this was a bad idea.

    I got on site after riding 40 minute at probably 70rpm and I thought it would not go well. My legs were heavy. The race format is quite simple. All categories start at the same time and there are 4 final sprints. Basically, the faster guys finish first and so on, with 2 laps between each final sprint.

    In the race, I was surprisingly satisfied with my gear selection. I could easily follow the 43-45km/h average and survive the few 50km/h bursts here and there. Anything faster was really hard and I had to rely on those distant high cadence drills from my track days.

    I finished 3rd on that race. I knew I had something going on. It was a great feeling.

    Technicalities

    You might wonder why am I relying on a huge Chainring and quite easy freewheel combination. So I’ll explain why I went for that specific gearing and also why I didn’t have much choice.

    Most track bikes have a rear wheel spacing of 120mm; So does the Vigorelli Shark. So I had to use a track hub. They do come in various declination of configurations but the axle always measures 120mm:

    • Fixed (single side)
    • Fixed (dual side)
    • Fixed/Free (commonly called Flip-Flop)

    The thread size on those hubs, to mount the fixed cog or the freewheel, is 1.37 x 24 tpi. The freewheel threads are usually deeper to accommodate the freewheel but you could ultimately install a freewheel on a Fixed only hub. The freewheel would hold on with less threads but I am confident that it would hold well for most cyclist.

    That thread size is a limitation when it comes to freewheels. As a matter of fact, to be able to fit a freewheeling mechanism in between thread and a cog, you need some real estate that dictates the minimal inside diameter of the cog. Therefore, unless you run a BMX hub, with a spacing of 110mm and a thread of 30mm x 1, you can’t use anything smaller than a 15T freewheel. They just don’t exist.

    So this led to finding a big enough chainring that would allow me to have a nice cadence in most race situations but that would also clear the chainstays. In fact, the first crank I used for that build was a Miche Primato and the 56 would rub against the chainstay because of the narrow chainline. The Ridea solved that problem for a while until I eventually wanted to try a 59 chainring. The Shimano Dura-ace track crank set was the final option and last one that I tried. I works, but it does rub sometimes under extreme sprint loads. (anything above 1700w will make the chainring rub a bit against the frame).

    If you are looking for a ressource to determine your maximum speed at any given cadence, with a specific tire size you should refer to Bikecalc.com . It is a very useful ressource that I often use for custom Gravel bikes when people consider going 1x and fear they will lack high or low gearing.

    Here is a grid specific to my Cinelli Vigorelli Shark set-up.

    Final speed calculation based on gear ratio and tire size.

    Considering how ”light” the gear is in a race that averages around 44-45km/h, is was quite hard to sprint against guys using road bikes. In fact, I had no punch, no torque so to say, to initiate my sprint. So I had to resort to sprinting while seated at a high cadence.

    Adapting my race strategy

    Considering the limitations I had I decided to stop concentrating on the final sprint and decided that it would be better for me to try to launch an attack with a little under 3km to go. That light ratio still allowed me to punch quite fast to create a break in the peloton and hopefully start a small breakaway with a few willing guys.

    Turns out that no one wanted to follow those attacks and I ended winning 3 or 4 races in a solo breakaway.
    I felt like the Houdini of crit racing, being able to escape the pack and win solo.

    Bridging to existing breakaways and holding on with the faster guys was quite a challenge. The lack of torque and the high cadence meant I was limited to hold on the wheels and skip pulls as much as it was acceptable.

    Another solo win on the Cinelli Vigorelli shark.

    Fun fact

    In a humble way, as I was proud of going on with this project and the results I got. In fact, I am pretty sure this is the first time anyone attempts this, at least in the Quebec province. But it did not catch on with other racers. It actually took a while before anyone noticed that I had a single speed bike. And because people got used to the ”Fixie” bike trend, most of my co-racers thought I was riding a fixed gear bike in a road criterium. (Which of course is not ”ok” by any stretch of imagination).

    The Cinelli Vigorelli Shark crit bike is a really nice project but it proves again that like most things in life, you have to do them for yourself and your own personal growth. There was absolutely no hype associated to this adventure, which is ok, but I did feel like it should and could have got more attention and recognition. I guess it is only human to feel so and I eventually got over it.

    What’s next

    We have a race series in Montreal called ”les mardi de Lachine”. It is a very fast criterium with average speeds around 50 km/h. Since the pandemic, it was canceled but apparently it will be back in 2023.

    My goal would be to re-assemble that frame and race those events with the bike. At least once, hoping that I’ll be able to hold on the pack.

    It will require a combination of appropriate gearing and good/optimal physical condition. One of the two can easily be taken care of.

    I’ll let you guess which one it is.