Category: Reviews

Cycling product testing and reviews.

  • Test de résistance au roulement des pneus de gravel.

    Test de résistance au roulement des pneus de gravel.

    Enfin un test de pneus de gravel.

    Trouver le bon pneu de gravel est un défi de taille. il y a tellement de choix, de paramètres, que cela peut devenir difficile de prendre une décision.
    On peut choisir un pneu selon plusieurs critères. La résistance au roulement en est un. On peut aussi choisir un pneu de gravelle en fonction de sa fiabilité, son poids, sa facilité d’installation, le confort, son profil de crampons, le style et la couleur.

    Je me suis donc lancé dans ce projet ambitieux, afin de tester 3 modèles de pneus de gravel afin de déterminer lequel est le plus rapide, ou du moins, celui qui offre la moins grande résistance au roulement sur une surface de gravelle.

    Il existe quelques tests similaires, la plupart fais en laboratoire mais je n’en ai pas trouvé qui ont été fait dehors et sans biais de commandites ou de lien affiliés.

    Les pneus testés aujourd’hui:

    • Continental Terra Speed. 700×45
    • Vittoria Terreno Dry. 700×40
    • Panaracer GravelKing X1 2024. 700×45

    J’ai choisi ces pneus pour les raisons suivantes:
    -Le Vittoria Terreno Dry est équipé de série sur plusieurs vélo, il est donc plutôt commun.
    -Le Terra Speed a toujours été très populaire depuis sont lancement et est maintenant offert en 700×45, ce que beaucoup attendaient avec impatience. Il a la réputation d’être le pneu cramponné le plus rapide sur le marché.
    -Le Gravel King de Panaracer est un des premiers pneus de gravel ”mainstream” et la nouvelle version méritait d’être testée. C’est un pneu souvent négligé, pour plusieurs raisons. On va voir si cette nouvelle version,le X1, deviendra populaire grâce à son nouveau design de crampons. Vous pourrez lire mes premières impressions dans un autre article bientôt.

    Le test

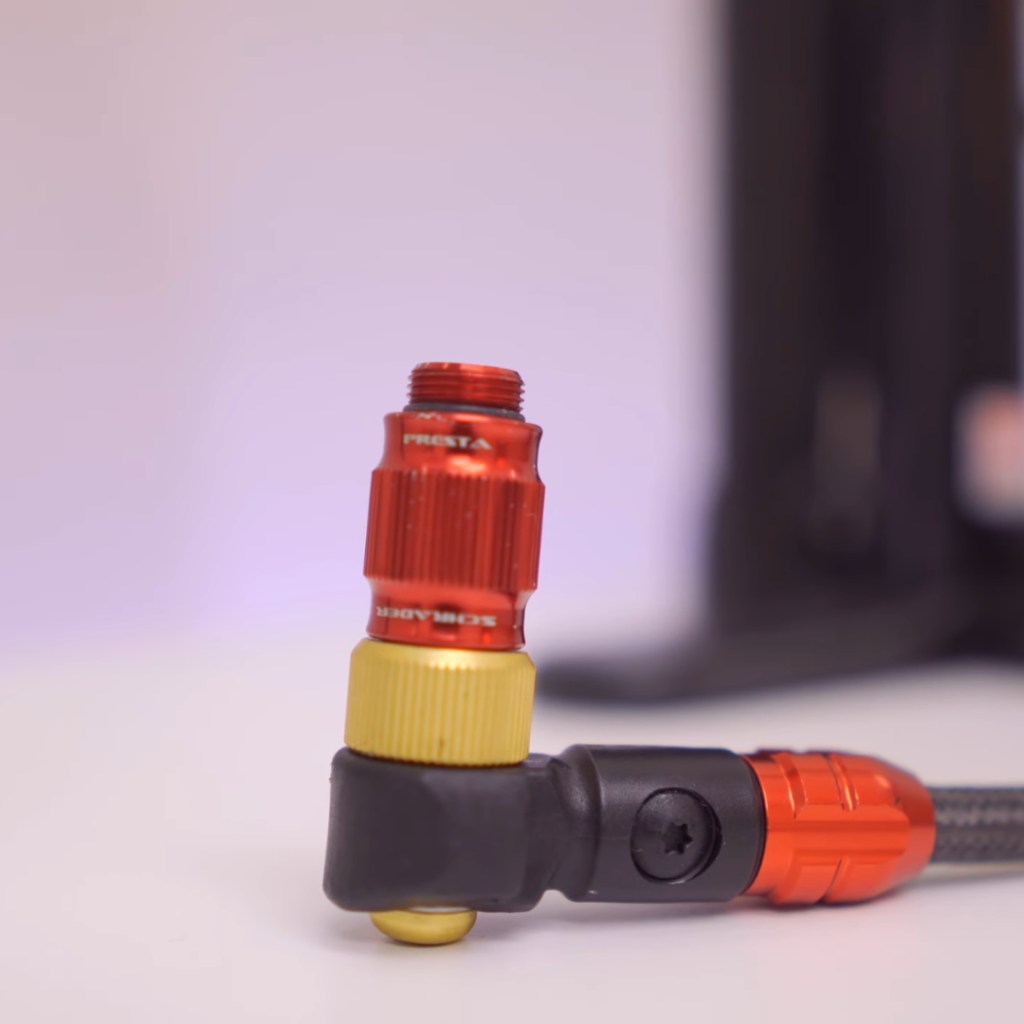
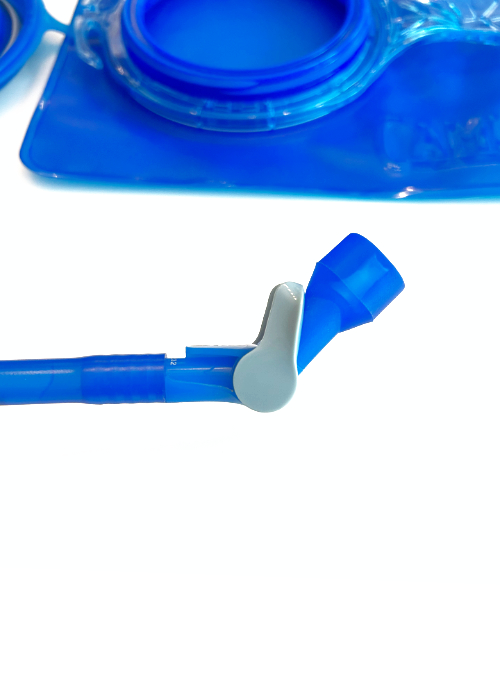
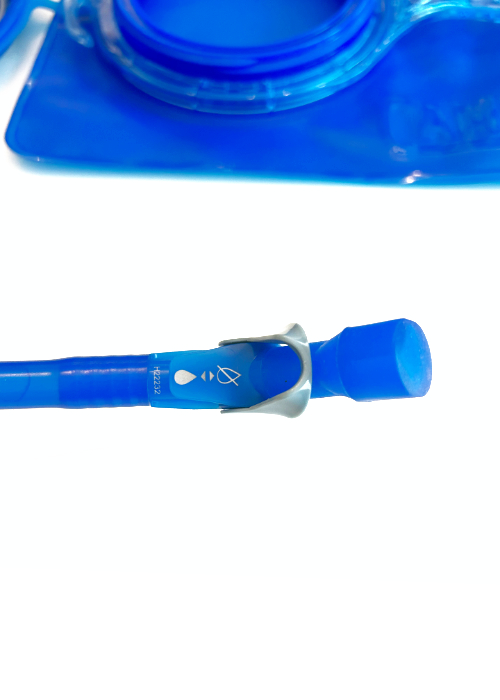
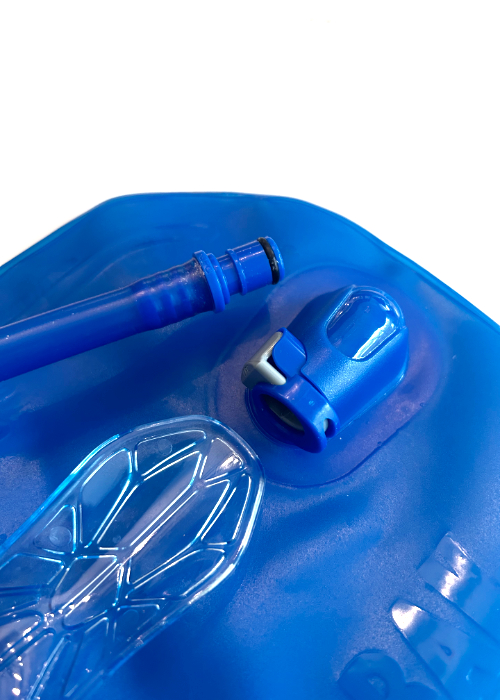
    Il a fallu un avant midi complet pour tester les 3 pneus (en paire évidemment). J’ai donc installé 3 paires de pneus dans le stationnement du parc Frédéric Back avec une pompe réservoir (la Lezyne Pressure Overdrive). C’était un peu sportif!

    La pompe Pressure Overdrive de Lezyne
    La gauge digitale Honest de Blackburn

    Voici comment j’ai testé les 3 pneus.

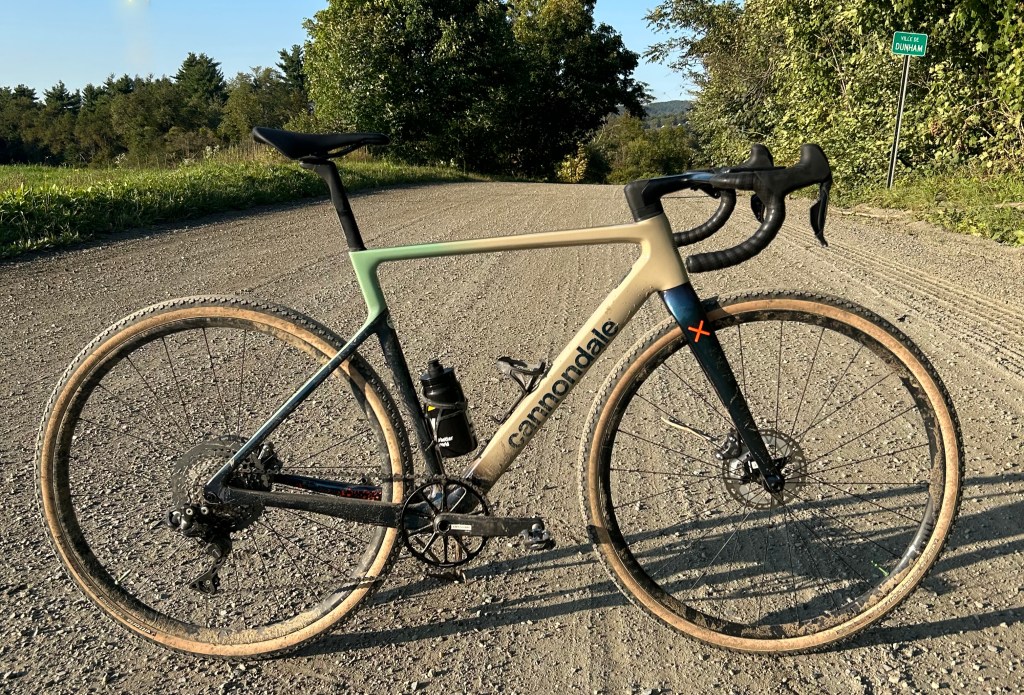
    • Le montage a été fait sur la même paire de roues.
    • Largeur interne 27mm.
    • Jantes en carbone Hookless.
    • J’ai utilisé un insert dans chaque pneu.
    • Montage tubeless évidemment, avec 30ml de scellant dans chaque pneu.

    J’ai ensuite fais une multitudes de boucles du parc, donc 5.35km par tour, en respectant les conditions suivantes:

    • Un premier tour à 25km/h avec 29psi dans chaque pneu.
    • Un deuxième tour à 30km/h avec 29psi dans chaque pneu.
    • Un troisième tour à 30km/h avec 26psi dans chaque pneu.
    • Le capteur de puissance a été fréquemment calibré.

    Résultats

    Le Continental Terra Speed porte bien son nom. J’ai eu du mal à respecter la vitesse de 25km/h que j’avais planifiée pour le premier test. Et je n’ai presque pas perçu la différence d’effort requis pour passer de 25km/h à 30km/h.

    Comme c’était le premier test de la journée, supposons que j’avais de bonnes jambes.

    C’est donc le nez collé à mon Garmin que j’ai fait mon premier test.

    Le profil de crampons minimaliste.
    Le Continental Terra Speed avec flancs beiges.


    Voici les résultats:

    25km/h à 29psi:

    • Moyenne: 25.84km/h
    • Moyenne: 156 watts
    • Moyenne normalisée: 195 watts
    • Temps: 12:35
    • Temps en position assise: 12:27

    30km/h à 29psi:

    • Moyenne: 30.86km/h
    • Moyenne: 226 watts
    • Moyenne normalisée: 255 watts
    • Temps: 10:30
    • Temps en position assise: 10:16

    30km/h à 26psi:

    • Moyenne: 30.91km/h
    • Moyenne: 226 watts
    • Moyenne normalisée: 255 watts
    • Temps: 10:30
    • Temps en position assise: 9:47

    Malgré une bande de roulement aux apparences symétriques, le Continental Terra Speed est bel et bien directionnel.

    Il faut donc l’installer dans le bon sens de rotation pour en tirer le maximum de performance et de rendement.

    Conclusions

    Le Continental Terra Speed est un pneu très rapide. En effet, selon le site tirerollingresistance.com; le Terra Speed en 700×45 est plus rapide qu’une multitude de pneus de route lisses, et ce malgré la présence de crampons.

    Il faut avouer que la taille des crampons est plutôt petite. Et les crampons latéraux ne permettent qu’une faible accroche latérale. D’ailleurs, déception, le 700×45 mesure 43 sur mes jantes, qui font pourtant 27mm de largeur interne. Je suspecte que le pneu s’écrase, à basse pression, et adopte sa largeur réelle ainsi.

    Par contre, la traction et l’adhérence peut être obtenue en réduisant la pression, ce qui permet au pneu de se déformer et de mieux épouser terrain. Il n’y a aucune pénalité à réduire la pression sur le Continental Terra Speed et c’est ainsi que vous en tirerez le maximum.

    Qui sait si la résistance de roulement ne serait pas identique à une pression encore plus basse. À vous de tester!


    Vittoria Terreno Dry

    Le Vittoria Terreno Dry, présenté ici dans sa version 2.0, est un pneu relativement passe-partout et efficace. Un look sobre, un design de crampon hybride, avec accroche latérale cramponnée et une bande de roulement relativement lisse.

    On remarque, visuellement, que la bande de roulement est relativement épaisse, ce qui met en confiance coté résistance aux crevaisons.
    Depuis que Vittoria a adopté le standard ETRTO, leur pneu sont devenus très facile à installer en montage Tubeless et sont très fiables.

    Surprise, Le 700×40 mesurait 42 sur mes jantes. C’est aussi le seul pneu avec un profil relativement ”carré”, qui s’écrase à plat sur le terrain, comme un boyaux.

    On remarque le design polyvalent du Terreno Dry.
    Le Terreno Dry avec flancs beiges.

    Voici le tableau des résultats.

    25km/h à 29psi:

    • Moyenne: 25.89km/h
    • Moyenne: 163 watts
    • Moyenne normalisée: 189 watts
    • Temps: 12:16
    • Temps en position assise: 12:29

    30km/h à 29psi:

    • Moyenne: 30.64km/h
    • Moyenne: 236 watts
    • Moyenne normalisée: 261 watts
    • Temps: 10:34
    • Temps en position assise: 10:25

    30km/h à 26psi:

    • Moyenne: 30.58km/h
    • Moyenne: 243 watts
    • Moyenne normalisée: 266 watts
    • Temps: 10:31
    • Temps en position assise: 10:25

    Le vittoria Terreno Dry est aussi un pneu qui a été conçu avec un sens de rotation.
    On peut facilement voir les crampons latéraux, qui donnent au pneu son caractère rassurant en virage.

    Conclusion

    Le Terreno Dry de Vittoria est un excellent pneu ”all-around” qui cependant, donne des résultats de résistance au roulement un peu plus élevés que le Terra Speed.
    C’est aussi le seul pneu dont la résistance au roulement augmente en réduisant la pression.

    Par expérience, ce pneu est aussi très lent sur l’asphalte à une pression de 29psi ou moins. Malgré cela, c’est un pneu qui mets en confiance et qui est prévisible.

    Compte tenu que les championnats du monde de gravel ont été remportés avec le Vittoria Terreno Dry, il serait intéressant de tester la résistance au roulement à des pressions plus élevées.


    Panaracer Gravel King X1

    Je découvre le Gravel King dans sa nouvelle mouture, qui apparemment est plus raffinée, plus rapide et qui propose un cramponnage amélioré.
    Le Gravel King est un classique devenu peu populaire car beaucoup de pneus plus modernes ont pris le marché d’assault et l’engouement pour ce pneu Japonais s’est estompé au fil du temps. La première version était aussi relativement capricieuse à l’installation et exigeait patience et détermination lorsqu’on voulait le monter Tubeless. De plus, le pneu avait la réputation de projeter les petits cailloux qui se coinçaient entre les crampons vers l’arrière, ce qui rendait l’expérience plutôt pénible pour les cyclistes autour.

    Le design élaboré de crampons du X1
    Une étiquette plutôt jolie. Fait au Japon.

    Voici les résultats.

    25km/h à 29psi:

    • Moyenne: 25.89km/h
    • Moyenne: 156 watts
    • Moyenne normalisée: 185 watts
    • Temps: 12:36
    • Temps en position assise: 12:00

    30km/h à 29psi:

    • Moyenne: 30.43km/h
    • Moyenne: 227 watts
    • Moyenne normalisée: 255 watts
    • Temps: 10:32
    • Temps en position assise: 10:13

    30km/h à 26psi:

    • Moyenne: 30.85km/h
    • Moyenne: 224 watts
    • Moyenne normalisée: 247 watts
    • Temps: 10:28
    • Temps en position assise: 10:06
    La flèche qui indique le sens de rotation.

    Le pneu Gravel King X1 est aussi directionnel. Malgré la taille minimaliste de la flèche, le design de crampon permet tout de même de facilement deviner le sens de rotation.

    Le Gravel King X1 s’est avéré le pneu le plus difficile à installer.

    Conclusion

    Le nouveau Gravel King est un pneu surprenant! Confortable et prévisible, offrant une accroche latérale surprenante. Idéal pour ceux qui recherchent un pneu qui mets en confiance, particulièrement en virage sur gravelle douce.

    En chiffres: ce pneu, comme le Terra Speed, s’est avéré un peu plus rapide à plus basse pression. La sensation à plus basse pression était excellente. On peut sentir le pneu se déformer et mordre dans la gravelle ce qui donne cette sensation rassurante et prévisible.

    Je n’ai pas eu le temps de tester la gomme sur l’asphalte, alors je mettrai à jour cet article éventuellement.

    Aussi, Il semblerait que Panaracer a amélioré son design de crampons: le nouveau Gravel King ne lance (presque) plus de cailloux vers l’arrière.


    Et le gagnant est…

    Considérant l’infime écart qu’il y a entre chaque modèle, est-ce réaliste de déclarer un gagnant? Probablement pas.

    Après tout, ce test n’est probablement pas le plus fiable, puisqu’il faut prendre en compte le vent qui varie constamment, l’achalandage des autres usagers du parc, puis ma fatigue cumulée au fil des tests qui influence ma perception.

    Si on observe seulement les données obtenues (en watts), on peut classer ex-aequo, au premier rang, le Continental Terra Speed et le Panaracer Gravel King.

    À prendre avec des pincettes.

    Plus de Graphiques!

    Comparaison des courbes de puissances à 25km/h – 29 psi
    Comparaison des courbes de puissances à 30km/h – 29psi
    Comparaison des courbes de puissances à 30km/h – 26psi

    Comparatif final (non-corrigé)

    Panaracer Gravel King X1

    • Moyenne: 30.85km/h
    • Moyenne: 224 watts
    • Moyenne normalisée: 247 watts
    • Temps: 10:28
    • Temps en position assise: 10:06
    • Facilité de montage:
      3/5
    • Taille annoncée: 700×45
    • Taille mesurée: 700×44

    Continental terra Speed

    • Moyenne: 30.91km/h
    • Moyenne: 226 watts
    • Moyenne normalisée: 255 watts
    • Temps: 10:30
    • Temps en position assise: 9:47
    • Facilité de montage:
      3/5
    • Taille annoncée: 700×45
    • Taille mesurée: 700×43

    Vittoria Terreno Dry

    • Moyenne: 30.58km/h
    • Moyenne: 243 watts
    • Moyenne normalisée: 266 watts
    • Temps: 10:31
    • Temps en position assise: 10:25
    • Facilité de montage:
      4/5
    • Taille annoncée: 700×40
    • Taille mesurée: 700×42

    Comparatif du data à 30km/h – 26 psi

    Note importante.

    Je dois souligner que la paire de Vittoria Terreno Dry et les inserts vittoria, ainsi que le scellant, m’ont été offerts par Vittoria. C’est en partie grâce à leur aide que j’ai pu faire ce test.

    Les autres pneus ont été acheté en boutique (localement).

    Jamais Vittoria n’a eu d’influence sur le contenu produit, soit écrit ou visuel.

    J’en profite tout de même pour les remercier de leur confiance et leur support.

  • Velobike Skat Endurance Handlebars Update

    Velobike Skat Endurance Handlebars Update

    As far as I know, the Velobike Skat Endurance Handlebar is the first modular handlebar on the market.

    By modular, I mean that it can be adapted to offer different types of hand positions and (to be confirmed) to different aerodynamic characteristics.

    The Grip-C

    When I originally purchased this handlebar, it came with the Grip-B, which are fine, but I wanted the grip-C, that seems to offer a better grip and safer position by locking your thumb onto the grip. the grip-C finally arrived and I went on to install them.

    The Velobike Skat handlebar with Grip-B
    The Grip-C with Grip-B in background
    Installation

    All these grips can be easily removed by using an hex key. Well in fact, you need 2 sizes: 2.5mm and 3mm. If I was the type to change my grips depending on what event I was attending, I’d really wish only one hex key size would allow to remove all the bolts.

    After fiddling a bit, I can recommend that if you have to replace your grips, get the top bolt snug before the front one. when I did the opposite, the top bolt was not going in easily, as it was rubbing against the grip itself. Seems like the top hole position could be moved forward by perhaps 1mm…

    The installation is still easy and everything perfectly fits. It’s just me being picky considering the high price of this handlebar.

    Comfort

    Well, I was quite surprised. the Grip-C has a quite sharp edge where the thumb rests. I think I was hoping for something a little more ”round”. I added some Zefal Coton Tape to provide some grip and comfort.

    Most pictures I have seen online from athletes using these showed that the grips are actually used as some sort of aero extension rather than ”brake hoods”. It’s only a matter of time before the UCI reacts and bans that kind of usage of the Grip-C. Hopefully, I’ll be able to use them enough before it happens.

    Final thoughts

    I am still very excited about these handlebars: finally adding a safer grip option, that clearly makes this product unique compared to my Bici hoods, was what I was looking for all along. It will allow me to adopt a very ”aero” position while having a firm and secure grip on the handlebars.

    Not ready to spend so much money on handlebars?

    More and more options are becoming available on the market. Seems like Bici will eventually come out with a new hood design, so keep an eye out for those. I’d say the strongest contender and most viable option as an alternative to the Velobike Skat Handlebar is the Vision Metron Track handlebar. The Thumb rest is very smooth, rounder and offers a similar grip surface.

    There are 2 main things to consider:

    – The vision Metron Track is only offered in one width: 36.5mm

    – It is very hard to find because it is rarely available.

    On a positive note, depending on your position toward high end gear and Track cycling gear: maybe you pay double the price for the Velobike stuff, but it’s readily available, worldwide. When you purchase something from Velobike, you get the feeling and the satisfaction that you are buying a product that was made for track cyclists and that the company cares about their customers.

  • Velobike Skat Endurance Handlebar Review

    Velobike Skat Endurance Handlebar Review

    The OG handlebar for Track Cycling Bunch events.

    By proposing a new type of modern handlebars for track cyclist, Velobike challenged the whole track cycling market by introducing new products to a market that is usually dominated by big or obscur companies, offering limited access to the best equipment at ridiculously high prices. So if there is one thing that Velobike have succesfuly achieved, it’s that they have set a standard for equipment usage amongst athletes worldwide. Equipment that they developed, designed and marketed very well to a point that world class athletes and amateurs adopted their products massively.

    In fact, they proposed solutions to problems that most track cycling were having. Coming up with a complete catalog of stuff that a close to inexistant critical mass of track cyclist, spread around the world, went on to adopt and perform at all levels with.

    Furthermore, Velobike have managed to create products that adapt to the needs of high performance track cycling, that can integrate to existing bike platforms and at a price that is still decent. In a very small market where almost every component is proprietary, this is something quite interesting.

    I went to the bike shop

    Among the nice things that you can find in Velobike’s catalog, is the Track bike adapter kit for your smart trainer. Something I have been wanting for years when I was more invested in track cycling.

    Although I really wish i could ride my track bike on my smart trainer these days, I decided to purchase a set of Skat Endurance Handlebars instead. And against almost everything I believe in, I went ahead and purchased the 300mm wide version. Because, yes, I think the super narrow handlebar trend, especially on the road, is dangerous.

    So I can say this, all that will be written here will be my honest opinion and review of this product, that has set a standard in the ”track cycling handlebars business”. If I was the type of person to use clickbait titles, I’d use words like ”disrupting”. and ”broken” to make a tiktok video of this review.

    Here is what we are talking about.

    Why?

    As I am getting less and less flexible, it became obvious that I would spend most of my time riding the track on the top of the bars. For a while, I have been using the Bici Hoods that are great, really great. My search for new ways of finding speed lead me to numerous articles about drag, aerodynamism and how to be as efficient as possible while traveling at high speeds on the velodrome.

    Since I failed to find ridiculously narrow alloy handlebars to mount my Bici hoods on, I started to consider the higher end products.

    the Bici hoods, from Trackloft
    The Bici Hoods
    The Bici hoods are a simple yet effective way to add hoods on your handlebar.

    I also wanted something that would be close to a ok time trial position, without having to invest in a whole TT setup. I was never a good Time-Trialist, mainly because of my lack of flexibility. I just can’t get into a good aero position and output my best power at the same time. Add to that the amount of time you need to ride in that aero position, fine tune it, fiddle with adapters and expensive parts and yeah, you lost me.

    So I came with what seems to be the best alternative. Work on my flexibility just for the sake of staying healthy, and find the lowest and narrowest position that is still comfortable and efficient.

    But why, again?, because every bit of time you are not spending to fight against air resistance on a track bike, is time that you can use to either go faster or further.

    The Skat Endurance Handlebar

    It’s a massive piece of T800, mixed with T700 carbon, with a glossy finish. Notice that there are inserts on top of the bars. Those inserts are interchangeable, offering different types of grips (of lack of). At the time of writing this, only the Grib B were available, but I am waiting for the Grip C, which seems to be the most popular grip used out there. The grips are made of Nylon, and manufactured by using a MFJ additive process.

    The Grip-C is the design that made this bar so popular, and finally, some other manufacturer are adopting it and integrating similar concepts into their track bar design. The thing is, track cycling is sooooo marginal, that everything costs a lot of money. A lot. but when you compare the 12 000$ handlebars that some other companies make, the Skat Endurance handlebar is almost inexpensive, (almost).

    Aside from the grips, the handlebars have a nice little flare in them, which is nice. It gives some room for the forearms when in the drops and ads a little bit of stability when out of the saddle.

    Finally, there is a little notch on the left side of the aero top for your thumb. this was specificaly designed to allow for a better grip when giving your relay during a Madison race. I don’t see myself using this but for real endurance riders out there, it’s a plus.

    The Skat Grip-B
    The specs

    There are 4 sizes available for the Skat handlebar. Ranging from a super narrow 275mm width to a casually narrow 350mm width measured centre to centre at the drops. With a 15deg flare, the width at the grips is narrower.

    Every grip can be replaced by another model to suit your needs. Those are feel pretty solid. I would not be afraid about breaking them.

    More info:

    – UCI legal for the 2023 ruleset (Yes I am afraid the rules will change and that I wont be able to use them next year)

    – Designed and tested to exceed 1.5x ISO strength requirements .

    – Ceramic gloss finish

    – Japanese Toray High Modulus Carbon Fiber (T700 and T800)

    – 275mm, 300mm, 325mm and 350mm widths (center to center) 110mm drop (center to center)

    – ø26mm grips

    – ø31.8mm stem clamping area

    – 15° grip angle

    First Impressions

    I rode with my new bars for 45 minutes on the rollers. I’d say the Grip-B is very similar to the type of support and comfort that the Bici Hoods provide. I can’t wait to get the Grip-C to try them out for additional support.

    The width is surprisingly comfortable. The flare is perfect. At first I thought I would have wanted more flare, but it turns out that 15deg is the sweet spot.

    The Madison grip is quite nice but I am not sure it suits all hands sizes. I have fairly square shaped medium hands, it’s perfect. Smaller hands will maybe have less support and larger hands will probably have issues fitting the thumb between the stem and the bar. As I can’t change hand size, I’ll have to get people to try it out.

    I think the only thing I would have wanted to be a bit different is the Bar end. It’s pointy, and I would have preferred a non-tapered, flat end. A bit like the Novacorona Ares Bars.

    What’s next?

    Testing.

    Who knows how many watts I could be saving with the Skat Endurance handlebar. So I’ll be testing different setups, and comparing values. It’s quite basic since I only have a powermeter to do that testing, but the velodrome is a fairly stable environment and it’s easy to test different equipment while respecting some basic parameters like speed and bike fit.

    This is one aspect of track cycling that is quite annoying for amateurs. No one shares their data. It’s such a competitive cycling discipline. I am sure that testing all that equipment is costing a lot of money and once a federation had found a fast formula, they have no incentive to share it with others. Which makes sense.

  • The Lezyne Pressure Overdrive Pump

    The Lezyne Pressure Overdrive Pump

    A pump designed for tubeless tires installation.
    Lezyne Pressure Overdrive floor pump.

    The struggle to install tubeless tires are home might be over. Especially if you have limited room and no space for a small air compressor. Introducing the Pressure Overdrive pump from Lezyne. A floor pump with an air canister attached to it that supposely can help you seat any tubeless tire. I have been testing this floor pump for the last 6 months and here are some thoughts.

    The Lezyne Pressure Overdrive floor pump is a big floor pump and thanks to its air canister and foot activated release valve; it’s ideal for seating tubeless tires at home and on the go.

    The secondary chamber (the canister) can be pumped up to store air under pressure. This air can then be used to seat a tubeless tire. If the tire was properly installed and centered over the rim, this sudden blast of air can easily seat the tire bead of any road, gravel and most mtb tires.

    I did a video review on my youtube channel about this Pump. I’ll link it a bit later in the article.

    Some cool specs

    The Pressure Overdrive boasts some cool features that are inline with Lezyne’s innovative nature.

    It’s got a huge gauge. It sits at the top of the pump so not only is it easy to read, but it’s also less prone to get damaged and collect dust.

    The (infamous) Lezyne air chuck also has an incorporated valve core remover. Quick tip: if you remove the valve core before trying to seat your tubeless tire, you will greatly improve your chances of succeeding.

    the Lezyne ABS-1 pro chuck
    the ABS-1 pro chuck can also be used as a valve core remover.

    Most of the small parts are available from Lezyne or their distributors, so you can replace the chuck, the hose, the gauge, etc. Even the wooden handle is available.

    It can inflate tires up to 200psi.

    How it works

    It works just like a regular pump, but keep in mind that you should always keep some air in the canister, even if you don’t plan on installing tubeless tires. If there is no air in the canister, the air contained in the tire will flow in the canister. That means more pumping.

    Once you operate the foot lever, the air in the canister will flow in the tube/tire/tubular (or the other way around if there is more pressure in the thing you are trying to inflate) until the pressure in both is equal. Only then it is possible to inflate to the desired value.

    Before disconnecting the hose, make sure you close the canister valve. Otherwise, you will lose all that hard gained pressured air. (It happened to me a lot, and it sucks.)

    Does it work as promised?

    Yes! Especially if you remove the valve core first. And there are more ifs:

    Make sure the tire is well installed

    Make sure the rim tape is in good condition

    Get as much air as you can in the canister. Don’t think 80psi will be enough, it won’t.

    Once you open the valve, the air will quickly rush out of the canister. Make sure you can help the tire seat, or ask a friend to help you if you have one of these super supple tires. (Like a Rene Herse extralight).

    Is it a good everyday floor pump ?

    Not really. First of all: It’s slow. Although the actuation is very smooth, and it’s easy to get high pressures out of it, the volume it displaces is quite low. If you are in a rush before a race or at the shop, I would not be using that pump.

    Then, keep in mind that a lot of people just can’t manage the Lezyne ABS chuck, so you will either have to help them inflate their tire or replace it when they break it. I’ve been dealing with that chuck since it launched and I can tell that it’s not a popular feature.

    Luckily, Lezyne also makes a more traditionnal chuck, the Dual Valve Pump Head, that can be installed on any of their pumps.

    The pros

    It works for what it was designed for. Sounds obvious right? Well not all air canisters work and not all of them have the built quality of the Lezyne.

    The huge quantity of spare parts available for this pump means that your investment will last and you will be able to maintain it over time.

    It can also inflate track tubulars. Yeah, at the opposite of the tire technology spectrum, you will find tubulars. A stitched closed tire casing with an inner tube stuck inside, sometimes made of latex.

    Thanks to a gauge that goes up to 200psi, and because the pump is actually easy to operate, even at high pressures, this pump can become your track day pump. Incidently, a Silca 90degre pipe fits the ABS chuck threads perfeftly.

    It’s built to last. The Pressure Overdrive, like most Lezyne products, is made of quality materials, more often then not machined alloy and steel. High grade plastics are used for smaller parts.

    The cons

    It’s bulky and not well suited for travel or weekend rides. So you’ll need a second pump to throw in your car or the keep next to the door when you just want to add a wee bit of air.

    The ABS chuck is a well designed product. I personnaly dont mind it, but I know it’s not made for everyone. It can lead people to get so angry at their pump… believe me. There is a lot of tightening and untightening involved in inflating a tube or tire with a Lezyne pump. Plus, I’ve seen countless amounts of valve cores behind removed by accident by unexperimented Lezyne pump users.

    Get the Dual Valve head and be happy. 🙂

    Let’s talk about the price

    At 149$us, 199$cad, the Pressure Overdrive pump is not cheap. Heck it’s the price of a small air compressor.

    But the built quality is up there. The many functionnalities and characteristics are worth the price. Plus it’s a non-disposable product: spare parts are available and easy to find. If you care about keeping your stuff for a long time and reduce your consomption of products that end in the bin, any product made by Lezyne is made for you.

    Is it for you?

    If you enjoy doing your own mechanical work, and you have to deal with multiple tubeless wheelsets, this could be for you.

    Especially if you have limited space. Perhaps, like many, you live in a small appartment or far from a bike shop.

    If you only have one bike, and don’t care about tubeless installation, this is probably not for you. There are better floor pumps for general usage. Also keep in mind that dealing with tubeless tires, sealant, rim tape installation and worned out valves can be frustrating and exhausting. Sometimes it’s just better to bring your stuff to your local bike shop and have them do the work, with better tooling and more ressources.

    Verdict

    As a ex professional mechanic, dealing with many tubeless wheelsets, the Pressure Overdrive pump is the best home mechanic pump I could hope for. It’s also, I must say, the minimum I would go for considering the high volume of bikes I have to maintain. Anything less than what the Lezyne Pressure Overdrive has to offer would simply not cut it.

    During the 6 months I used this pump, I also came to the realization that I am probably going to need a small good quality air compressor.

    Video review
    About the testing and review:

    I purchased the Pressure Overdrive pump with my own money. Although Lezyne sent me many products to review over time, they did not have access to this review before posting it. My review and opinions are solely based on my experience with the product.

  • Bont Vaypor G long term review

    Bont Vaypor G long term review

    I always thought that the shape of any shoe, may they be trendy, casual, dressed or for sports, never fitted my foot shape.

    Not that I have any sorts of congenital deformation or an abnormally shaped foot. I just always felt like if my toes were crammed at the front of a shoe, it would limit my ability to perform whatever I want to do and would eventually cause long term injury.

    Take any Italian designer shoe… change the materials, drill 3 holes under it and Voilà! You are a cycling shoe designer!

    Most cycling shoes look really good. They however don’t offer any sorts of comfort and most of the time you will end up with numb feet, cold feet and/or blisters and small injuries.

    Same goes for running shoes, golf shoes, climbing shoes etc. We like good looking things, fast and modern looking sports equipment. It’s a non-sense when it comes to shoes, in my opinion, that looks should prevail on function.

    A sports shoe is a tool used to enhance your performance, not limit it. Anyway…

    What are people buying?

    I worked almost 20 years in bike shops, and rarely did I ever sell a shoe that would perfectly fit anyones’ foot. (or feet, ’cause you know, most of us have 2). Most cycling shoes from the early days till mid 2000’s where narrow, uncomfortable but hell! good looking. People would come in whenever an Italian brand had a new model out and purchase them. The requirements were: as stiff as possible, as light as possible, good looking.

    It did not matter if they were not comfortable. Looks, prestige and the promise of higher performance trumped any other considerations beside price of course.

    I can list all the cycling shoes I had in my life. Very few were comfortable and all the ones that were had something in common: they had a sole shape and body shape that was more round than most pointy aesthetic shoes and they did not squeeze my big toe outward.

    Here are some of the shoes I had in my life. The * marks the ones that were well made.

    • Shimano MO51 (a classic)
    • Some Scott shoes
    • Carnac Greg Lemond Edition *
    • Shimano Entry level road cycling shoes
    • Nike Carbon Cycling shoes *
    • Shimano SH-R300
    • Shimano SH-R310*
    • Sidi Ergo 2 Paolo Bettini
    • Mavic whatever shoes (the worst shoe known to mankind)
    • Shimano Spyre RC9
    • Specialized S-works 7 * (I have 3 pairs)
    • Specialized Torch S-works
    An old Carnac flyer. Damn those shoes were ahead of their time!
    Sidi Ergo 2 lux steel Paolo Bettini special edition shoes

    The idea is to let you know that I owned a lot of shoes, and tried even more as I did loads of product testing when I was working for my local bike magazine.

    From that list, I still own the Nikes (that I keep because I feel bad throwing them away) and my Specialized shoes.

    My opinion all those years was and still is: why do we, humans, make shoes that absolutely do not fit our feet? Has anyone looked at their feet before sliding them in any new balance runners or Sidi shoes? (I do not have anything against these brands specifically, they are successful brands and make good products). And I wonder why, even if they do realize their toes will be crushed, they still purchase them.

    What’s wrong with most cycling shoes?

    I am not a physio, doctor or health professional. So, I will not pretend to know more than what I can feel and experience. But you will find many articles about proper footwear fit and why it’s so important, if you look around a bit.

    But please try this: squeeze your finger together and pretend you are making spoons with your hands, like if you were using them to drink water. Now, keep your hands in that form and try to do 10 push ups. Well, try just 1! See? something is not right. If you are looking to perform in any kind of sport I think you should be able to stand and push on your feet without them being crushed laterally.

    Essentially, most cycling and sports shoes are too narrow. The pointy tip of the shoe makes it aesthetic but compresses your toes and could, over years, be the cause of bunions (Hallux Valgus).


    Bont Cycling

    The first time I saw those, they were Exotic AF (and still are for most of us)

    Bont is established well enough now. But the first time I saw a pair back in the mid 2000′ I was stunned how different the shape was. It stood out completely from anything else that was available on the market in that era and, sometimes, still does to this day. The Vaypor G is a clear example of that.

    So what is so different about these Bont shoes?

    They make anatomically designed shoes. Simple as that.

    This explains the unique shape of Bont shoes. It’s made to let your feet naturally sit on the sole while also being supported.

    There are many shape/fit available from Bont Cycling plus the fully custom option.

    • Standard
    • Wide (some models have 2x wide)
    • Asian
    • Full custom
    The Vaypor G has a distinct shape. 
Some gravel action going on here!
    From this perspective, the Bont Vaypor g looks like any other cycling shoe.

    The review

    When Bont offered me to try their shoes, and review them, I was stoked! So I might say I was a bit biased before even seeing the product.

    That being said: I was not sure about the Vaypor G at all when I first tried them on.

    First impressions:

    I don’t think there is another shoe out there that has a foot bed like the Vaypor G.
    So It is quite surprising when you first try the shoe on. The shoe feels very raw. You can perceive every bits of it, the sole, the upper, the carbon foot bed, everything.

    Another top view of the Bont Vaypor G
    Boa Dials are easy to reach and use. Plus, they are replaceable!
    The ultra stiff carbon sole is protected by replaceable guards that also provide grip when things get rocky muddy.
    First ride:

    I am not the type of guy who has fun spending too much time on adapting and fitting my equipment. So I took the shoes out of the box, slammed some cleats on them and went for a ride.

    On my first ride, I thought that maybe I should have heat molded them. The carbon foot bed is very stiff. In fact the whole shoe is very stiff.

    It’s not made for walking (if you are that type) and definitely is a high performance Gravel oriented shoe.
    I guess you could use them for Cyclocross as well, but running uphill on roots and rocks might not be the best experience ever with these shoes. I’d say that most elite racers do not even get off their bikes anymore.
    It’s less of a concern if you can bunny hop and ride up and down most obstacles thrown at you.

    Anyway, after my first 70km, my feet where hurting and I had a couple of blisters which made me think that I should have prepared better.

    Many many rides later

    I can easily blame my first ride experience on myself. I could and should have tested the shoes on shorter distances and, I barely rode my bike before going out for 70km of gravel. Which was dumb.

    The discomfort went away on the second ride. Like most new shoes, it takes a little while getting used to them. Again, I was dumb to just go out on a long ride and think I would be fine. After loads of shorter rides, a few cyclocross races and another Gravel event, I can say that I can’t really go back to my previous shoes. I prefer the fit of the Bonts.

    I did not attempt to mold the shoes as I never saw the potential benefit but I will, just for the sake of testing it.

    What I would recommend is to explore the different insoles that Bont offers. You can get low arch, mid and high. There is so much room for your foot so why not improving even more your fit and comfort.

    Designed and manufactured in Australia and specifically shaped to match the unique design of the the Vaypor shoes series.

    Built with a contoured carbon fiber core, for the ultimate in efficiency and support, Vaypor Series innersoles are wrapped in a dual-density EVA foam cover for a comfortable ride with fantastic durability.

    Offered in three widths (standard, wide/Asian and double wide), three arch support heights; low, medium and high, the Vaypor Series innersoles by Cobra9 deliver more evenly distributed peak forefoot pressure for greater support and reduction of hot spots and discomfort.

    Final thoughts.

    The Bont Vaypor G cycling shoes offer a distinct type of fit, some adaptability with heat molding and a stiff carbon sole capable that should assist and allow you to perform at your best level. The boa retention system works flawlessly and each dial can be replaced, with different colours also offered.

    Venting and heat management is quite good. I do prefer warm weather, so I did not experience any episodes of overheating.

    Power transfer is well transferred to the entire carbon sole. Even under heavy load, you can’t feel the cleat pushing against the sole like on so many other shoes out there. That is a huge plus.

    If you’ve always compromise on shoe fit and comfort and lost faith in finding the right shoe for you, I would recommend that you visit their website and go through the FAQ and different models they offer. It’s totally worth it.

    Pros:

    • Stiff
    • Anatomical fit
    • Boa retention dial placement is optimal
    • Replaceable dials, studs, heel pads and sole guards
    • Wide range of fit and size
    • Custom option available
    • Heat moldable
    • Competitive price for this level of quality, fit options and features
    • Awesome support from the company and the FAQ has loads of useful articles.

    Cons:

    • Rarely available in store for sizing and fit check
    • Not the best looking shoes out there
    • Requires a lot of research before ordering the right pair. If you are an impulsive buyer, make sure you take your time and read all the pertinent FAQ articles.
    • Longer delivery time (again, it’s a serious purchase, and one that will last a long time)(not a issue for me, but in a world where everything gets delivered next day, it’s something to keep in mind)
    Boa dials are available in many colors
    Bont Vaypor G sole guard kit.
  • Camelbak Circuit Run Vest Review

    Camelbak Circuit Run Vest Review

    The rebirth of Hydration packs.

    Here I am about to write about a product that used to make sense to have and that suddenly almost disappeared from the cycling world, only to come back stronger than ever thanks in part to adventure and gravel cycling.

    Still, Hydration packs are not new to cycling. Perhaps even some of you kept using one after the hype of the mid 2000’s.

    With the growth of gravel cycling and adventure cycling, and perhaps the introduction of long distances races, where some racers felt like stoping to get some water and food was out of question to save those precious seconds or minutes, the hydration pack is back! (yeah go on; make the joke…)

    I believe the OG hydration pack users where looking for maximum storage capacity and maximum hydration volume because back then, having stuff like packs and bags on your bike was lame.

    Fast forward to present times, where there are all sorts of different and cool frame, handlebar, stem and everything else bags. The necessity of carrying stuff (re)created demand for cool, light and performance oriented hydration packs.

    Why would you get one (or why did I want/get one)

    I am not the guy who does the most gravel events out there. And I am far from being one of the fast ones. So I often get to feed zones and either there is nothing left, or the waiting time is so long that when I get back on my bike, my legs are cooked. It sucks.

    My bike can handle 3 water bottle cages, 1 of which I keep for a tool box/bottle. It took me ages to come to the conclusion I needed an hydration pack if I wanted to not stop at feed zones or only stop if they had something fun to eat or drink.

    So if, like me, you want more hydration capacity while keeping the bike weight down a bit, then maybe an hydration pack is something you should consider.

    What I got and why

    So, I started looking at Camelbak’s website. I knew the brand (who does not), I once had an hydration pack from them (I had a love/hate thing with it) and considering the trendier brands out there, I knew they had some offering within a reasonable budget. In other words, I could get one, try it, love it or hate it, for cheap.

    I started browsing the cycling section of the website. I came accros the Chase Bike Vest, Hydrobak lite, Rogue lite and Classic lite. All of them reminded me of the old pack I had, with a bunch of pockets on the back to put your stuff. I understand if you need and want that, but it was exactly those features that I wanted to get away from.

    So I started looking at the running category. I though: ”runners need gels, bars, maybe a whistle, a small knife in case they get lost and want to build a cabin”. In fact, I don’t know what runners need but all that made sense to me.

    The very first product to pop was the Circuit Run Vest with a 1.5L capacity. No pockets on the back portion (except for the one containing the reservoir). My search was on to a good start.

    Circuit Run Vest
    Circuit Run Vest Mesh and front pockets

    Also, the front pockets looked easily accessible and there is even an additional pocket with a zipper so I knew that was plenty of storage for my needs. More on the pockets later.

    Here are the specifications:

    • BPA/BPS/BPF Free
    • Material : Recycled N70D Ripstop with C0 DWR
    • Size: 35 x 21 x 11 cm / 13.8 x 18.3 x 4.3 in
    • Pack Weight: 360 g / 12.7 oz.
    • Hydration Type: Crux® 1.5L Reservoir
    • Gear Capacity: 5.5 L
    • Hydration Capacity: 1.5 L

    I’ll say this, the fact that Camelbak mixes metric and non-metric units to specify the capacity of their products probably weighted in my decision to pick the Circuit Run Vest. I knew I was purchasing the equivalent of 3 water bottles (I usually run 550/620ml bottles). And I can not be bothered with onces.

    So now, I can start any gravel ride with the equivalent of 5 water bottles, which for me is about 5 hours of riding. It gives me the flexibility to empty both my water bottles and kind of pick when I fill them back up, potentially avoiding long queues at water stations.

    Sounds like a win.

    The fit and the feel of the Circuit Run Vest

    Both shoulder straps are adjustable in length of course. I am not sure yet where the pack feels best when riding, but the straps are plenty long and I plan on cutting them once I find the right fit.

    The chest straps are not the most meaty. In fact, they are pretty thin and I guess someone who runs would prefer the lightness of those straps over sturdy and more cushioned ones. I found that a bit annoying at first but quickly forgot about those when I was riding. In fact, I don’t use both so maybe I’ll cut the one I am not using as well.

    The Mesh of the shoulder straps and backing of the pack is good enough that you forget about it. I tried it on a hot summer day and I did not feel like I was carrying a toaster on my back. Seems like the cooling effect of the mesh works. Another win.

    Speaking of the Mesh, it’s not the most comfortable material to feel against your skin, and if you wear a light jersey, you might feel it a bit. Once you start riding, I believe you’ll forget about it quite fast, unless there is a real comfort issue or chafing. But I felt like it was comfortable enough, especially for an entry level, minimal hydration pack.

    Maybe one day I’ll try some of the fancy stuff, but for now the Camelbak Circuit Run Vest is perfectly fine for me.

    Storage

    Aside from the 1.5L reservoir, I did not really test the packs’ storage. I bought it because it has pockets on the shoulder straps and this is what I tested.

    The left shoulder strap has an extra zipped pocket in which Camelbak suggest you put your phone. I mean, yeah, sure. It’s a secured pocket, put anything you want in there. My phone with the case did not fit well enough and it would have been challenging to take it out while riding. I like to film stuff while I ride, sometimes I even get good enough videos for a cute reel or an instagram story.

    Both shoulder straps have a pocket to put your food, gels, tabs etc. and are probably deep enough to store a Banana. I’d say it’s the feature that annoyed me the most.

    The pockets are too deep. It’s quite challenging to reach anything that gets at the bottom, like half a clif bar, or the lonely leftover energy chew that you really need on that last 30 minute push to the finish line.

    So here I am thinking about how to adapt or modify those pockets. Maybe I just need to adapt how I store my food. Remember those reusable gels bottles that you could fill up with Energy gel sold in 1L containers? I have not seen gel sold in bulk for quite a while now, but that sounds like something I could do.

    One pocket for the gel bottle, one pocket for the bars and snacks.

    Overall, I believe there is plenty storage available and that if you need more, the Bike oriented packs might be the way to go.

    What about the hydration function?

    Well, if you fill the reservoir with water, you can drink that water. Fancy!

    In fact, I believe this is where Camelbak has made nice improvements over the years.

    • The Hydration hose is easily accessible and can be installed on either shoulder straps.
    • The valve that allows flow is easy to activate. No more fiddling with a tiny lever on a gummy spout. It is sturdy and gives a clear feedback on whether the thing is in one position or the other. There is a visual indication as well, but hopefully you wont have to look at that while riding.
    • The Crux Reservoir is easy to open and fill up. It is equally easy to open for cleaning. That is a major win over the older reservoirs.
    • You can easily remove the hose from the reservoir for cleaning.

    Bells and whistles

    Like a lot of adventure packs and backpacks, the Circuit Run Vest has loads of small straps and loops that allow you to hang or clip stuff. I have no idea what, but I am sure there are creative and functional ways to use those bits.

    And there is also a whistle! Surprisingly loud enough to annoy someone beside you, not sure if it would be helpful in an emergency situation, but it’s there. I’d rather have it than not.

    Final words

    I wanted a light hydration pack, capable of carrying a small amount of food and gels, maybe car keys and add enough hydration capacity to my setup so I can be autonomous and not rely on feed stations.

    I found exactly that with the Circuit Run Vest.

    Pros:

    • inexpensive
    • adequate
    • no nonsense features
    • easy to clean reservoir
    • available spare parts

    Cons:

    • lacks something of a premium feel
    • Shoulder straps might not fit taller/larger people
    • not easy to remove or equip while riding
    • the hose is very rigid
    • Colors are boring!

    if you are looking to get your first hydration pack for gravel events, and maybe have one for running as well, this might be it! It’s lightweight and has enough features to get you through most bike rides if you have other storage solutions already equipped on your bike.


    * I purchased the Circuit Run Vest with my money, from my local bike shop and my opinion is based on my riding experience alone.

  • The smoothest ride since tubulars – Vittoria Corsa Pro

    The smoothest ride since tubulars – Vittoria Corsa Pro

    The new Vittoria Corsa Pro might be the best tire out there.

    I was actively looking for new tires that would allow me to ride till the end of the 2023 road season. I recently had small issues with my Pirelli tires, who are affected by a recall.

    As it often happens at the end of the summer, shops and distributors have very little in stock. And I was not going to settle for some third tier tire as I knew these would probably stay on my bike until late next season.

    So of course, I went out looking for a pair of Continental GP 5000 TR, in 700×28. And no luck: it’s out of stock. Everywhere!

    I was maybe going to consider a pair of 700×30 but then I saw a nice box with the Vittoria logo on it. A quick web research about the new Corsa pro confirms what most of the experts predicted when that tire made its first appearance on Jumbo-Visma Bikes. They are supposed to be fast, comfortable and reliable.

    The last set of GP 5000 (clinchers) I had were… boring. Efficient? Sure. Comfortable? not really. Did they feel fast? Not so much either. I know they are great tires. But I was looking for tires for my casual ride bike. The bike I take out when I ride with friends, on fast group rides or the casual ones. I wanted tires that would make my bike feel great! Not just be the most efficient and fast.

    Of course, I had Vittoria tires in the past. And honestly, I was never impressed. The so called ride quality of the open tubular tire never really convinced me. The first generation of open corsa, way back mid 2000’s, was fun to ride for maybe 200km until you started getting punctures after punctures. Then, I probably tried each iteration of those tires, either through sponsorship or by curiosity. And my opinion never really changed.

    So I was holding the box in my hand, thinking of my history with those tires and I was not sure I was ready to take a 200$ gamble. But reading about the new tire construction, and after getting some feedback from friends, I decided to show up at my local bike shop’s cash register and spend my money.

    Before Talking about the ride quality, I have to mention a few things.

    The packaging.

    Some of you may know, I criticize packaging a lot. For many reasons, but I generally judge packaging on those elements:

    • Is it somewhat ecological / eco friendly?
    • Is it easy to merchandise/market in store?
    • Does the packaging display all the important features of the product?

    Vittoria FINALLY moved away from those terrible Hexagonal shaped boxes, that kept opening from the bottom, quickly becoming a nightmare for bike shops to market on their sales floor. Those boxes were a small step in the right direction; ditching the previous plastic sleeves used to wrap the tires.

    Anyway: the new box is great! And here is why:

    • It’s made of recycled materials and is recyclable again. (depending on the facilities in your area, the packaging is even compostable.)
    • Displays all the pertinent info about the tire and even more!
    • It’s got a nice little handle so shops can easily hang it on their walls.

    I was so excited to get the tires out of the box that I forgot to take a picture of the Unopened box.

    Technical information

    One thing that tire manufacturer are trying to do is to come up with some sort of Tubeless standard, even more so since a lot of wheel manufacturers have implemented (for better or worse) the hookless rim technology into their lineup of products.

    Well, Vittoria did their homework and are displaying a lot of technical info on the box and the tire itself. You can now easily determine how safe it is to ride this tire depending on the rim you own and potentially avoid all the possible nightmares caused by the road tubeless technology.

    In my case, I knew that the ETRTO specification of 700×30 on 21mm width rims was perfect for my Hollogram wheels. Plus, Vittoria clearly indicates the maximum tire pressure recommended depending on your wheel setup, which makes it easier for anyone to inflate their tires safely.

    You don’t have to read the fine prints: All the info is clearly displayed.
    Technology made its way on tires… imagine that!
    Tire Technology

    Of course these tires benefit from all the latest technology Vittoria has to offer.

    If you are into buzz words, you can look up all their spiel on Graphene (from which comes their obsession with the hexagonal shape) and Silica compound.

    The ride

    Alright! here we are.

    Until I get punctures after punctures, and cuts in the sidewall of this tire (if ever); I will say this:

    This is the most satisfying road bike tire you can ride, right now, on the market.

    Here’s why:

    • It feels absolutely fast (even the bulkier 700×30)
    • It is very comfortable and supple. ( keep in mind I am riding tubes for now)
    • I suspect this tire would be even more fun, supple and comfortable in a tubeless setup.
    • It has a similar grip feel than the GP 5000.
    • It feels light, fast, comfortable. (Yes! I am repeating myself)

    A few things to consider before purchasing:

    • There is only 1 sidewall color. It does not fit well with my bike. But it is what it is.
    • The price. This is definitely a high end tire with a premium feel.
    • Some might say it is hard to install. I personnaly thought it was in the ”easy to medium” range of how hard a tire can be to install.
    • Be sure to never use Amonia based Sealant if you are planning on riding Tubeless.

    Verdict:

    Possibly the best road bike tire on the market right now.

    I rode this tire for… 200km. Yup, that’s it. And it was enough to convince me.

    And I can tell you this: on a nice sunny, warm day, this is the best road bike tire I ever rode. It feels spectacular. It’s not dull, neutral, boring. It has some flair and it makes you feel great on the bike.

    What I also mean is that I have not yet had the chance to test the tires in wet conditions and I doubt I would even report on that in the future as riding in the rain is generally a ”mid” experience and tire performance is definitely not the first thing I have in mind. (unless I get a puncture of course)

    If you are looking for amazing, high end, high performance tires for next season, go to your local bike shop now and pre-order them. Keep in mind to verify with your wheels/rim manufacturer if the tires are compatible with them especially if you have hookless rims.

    * I purchased thee tires with my money, from my local bike shop and my opinion is based on my riding experience alone.